Dive deep into the world of 15 Essential pieces of calisthenics equipment. Understand what you need to kickstart your bodyweight training journey and unlock your maximum potential.
Table of Contents
Introduction to Calisthenics and it ‘s Equipment’s
Ever had the joy of lifting your own weight, feeling every muscle flex and stretch, and realizing how powerful your body is? Calisthenics are great. Having the correct calisthenics equipment can improve your workout and ensure safety. This article covers the calisthenics equipment that every enthusiast needs.
Weights and treadmills are commonly associated with fitness. Did you know you can work out effectively with just your body weight and some specialized equipment? Calisthenics awaits! This tutorial describes calisthenics equipment and how to use it for the best results. Let’s get started!
Calisthenics: What Is It and Why Do You Need It?
Calisthenics—from the Greek words “kallos” (beautiful) and “sthenos” (strength)—uses body weight as resistance. Equipment can boost intensity, diversity, and results.
Calisthenics, which uses body weight for resistance, has become popular. Did you know that while your body can achieve a lot, the appropriate equipment may improve your workout? Jump in!

Here is a collection of typical calisthenics Equipment’s and exercises.
- 1. Pull-Up Bar: Crucial for pull-ups, chin-ups, and muscle-ups. They come in various types, including door-mounted, wall-mounted, and free-standing.
- 2. Parallel Bars: Used for dips, L-sits, handstand push-ups, and more.
- 3. Gymnastic Rings: These are versatile and can be used for pull-ups, dips, muscle-ups, rows, push-ups, and more. The instability they introduce makes exercises more challenging.
- 4. Push-Up Handles: They allow for a deeper push-up and can reduce the strain on the wrists.
- 5. Resistance Bands: Useful for assisting in pull-ups and dips for beginners, or adding resistance to bodyweight exercises for advanced practitioners.
- 6. Ab Wheel: Used for rollouts, which are excellent core exercises.
- 7. Jump Rope: For cardiovascular workouts and improving coordination.
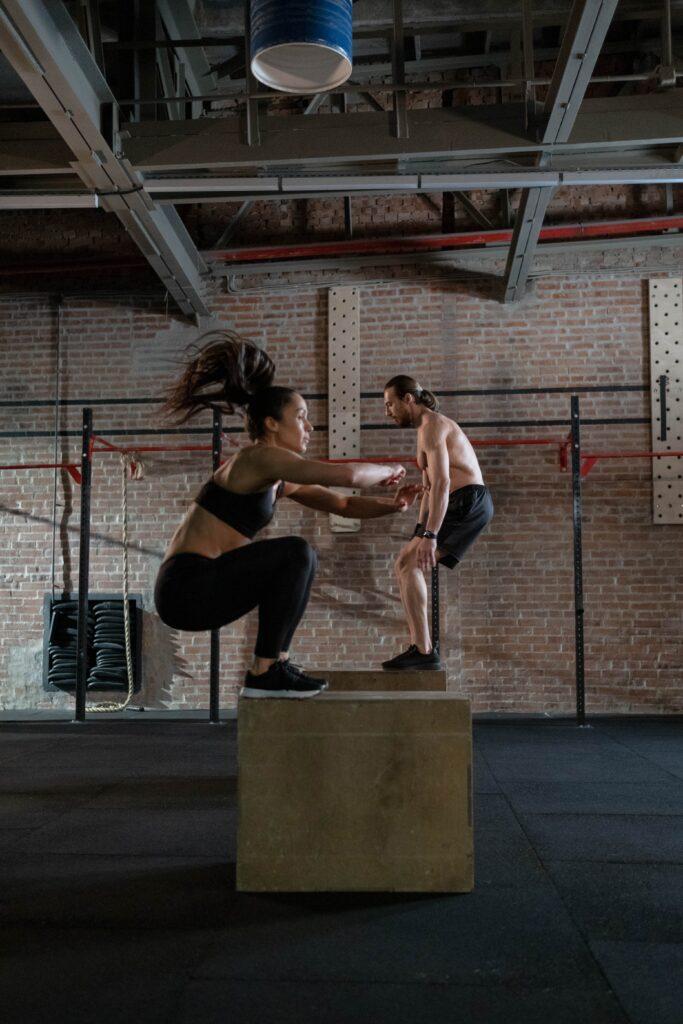
- 8. Plyometric Box: Used for box jumps, step-ups, and other explosive movements.
- 9. Weighted Vest: Adds resistance to bodyweight exercises, increasing difficulty.
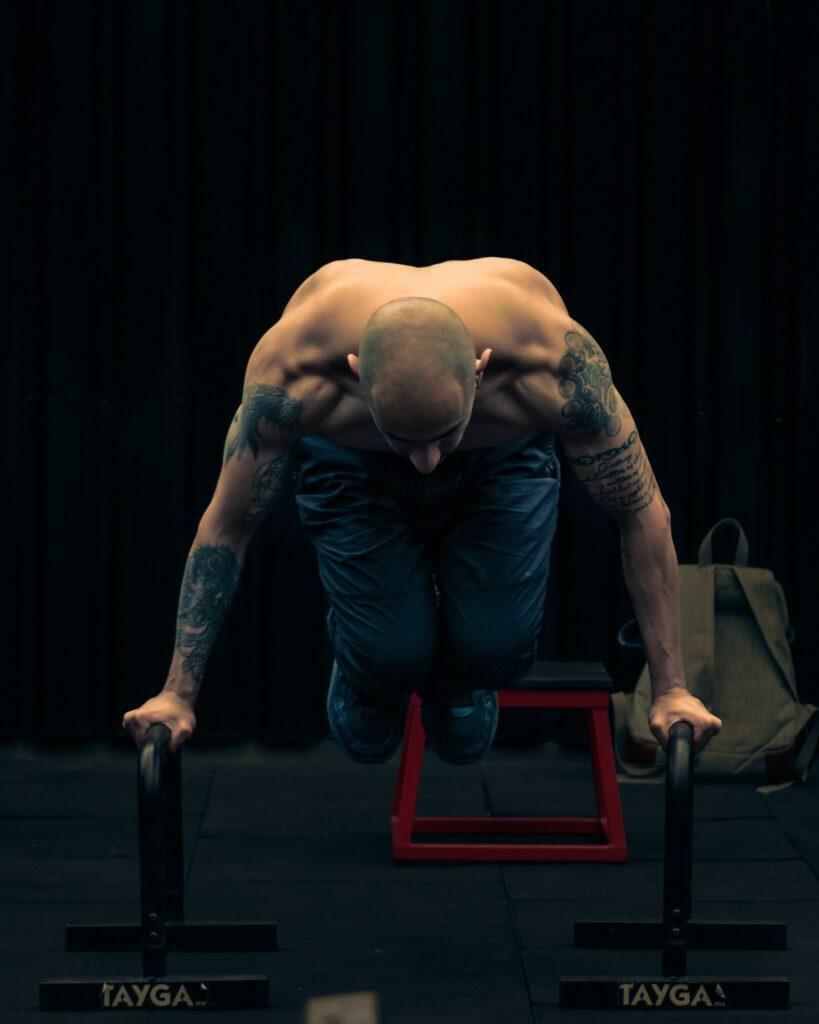
- 10. Parallettes bars: Small parallel bars used for L-sits, planches, handstands, and other ground-based moves.
- 11. Ankle Weights: They can add resistance to leg raises and other leg exercises. (Image credit: Getty/Mariakray)
- 12. Wall: Can be used for handstands, wall push-ups, and wall sits.
- 13. Yoga Mat: Offers cushioning and grip for floor exercises.
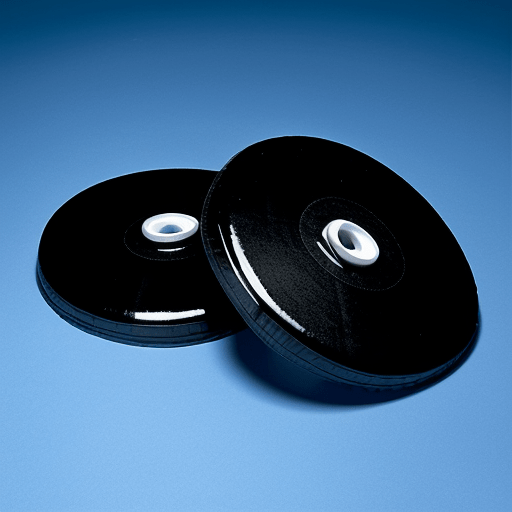
- 14. Sliders: Flat discs used under hands or feet to slide on surfaces, adding an element of instability to exercises like lunges, push-ups, and mountain climbers.
- 15. Suspension Trainers: Systems like TRX are not strictly calisthenics, but they are bodyweight-based and can be incorporated into calisthenics workouts.
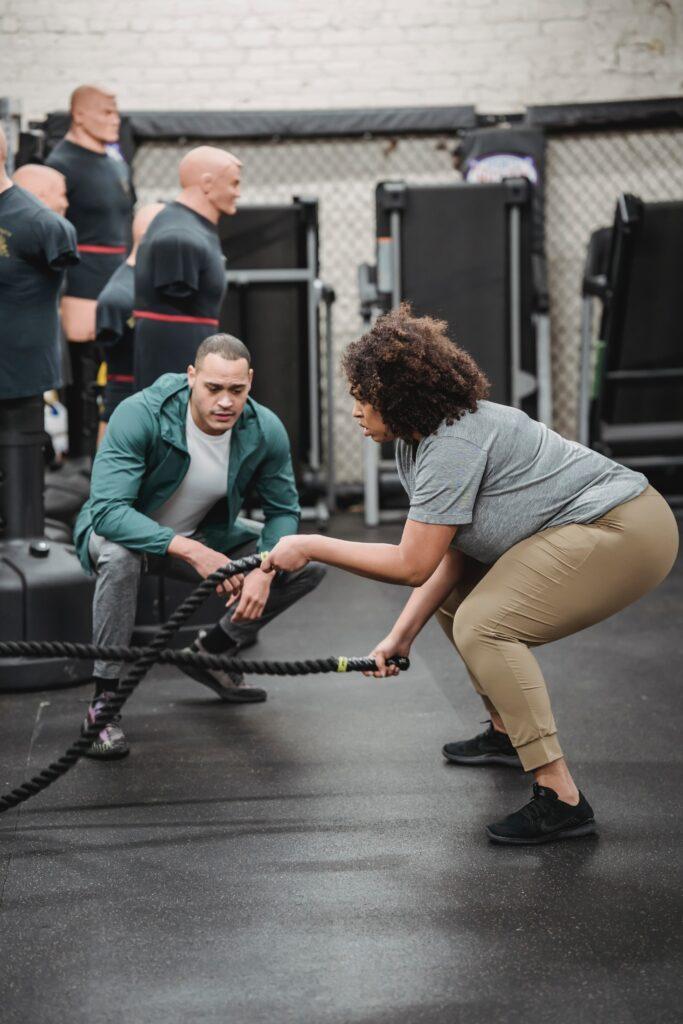
- 16. Battling Ropes: Though not strictly a piece of calisthenics equipment, they are often used in bodyweight circuits for cardiovascular and arm conditioning.
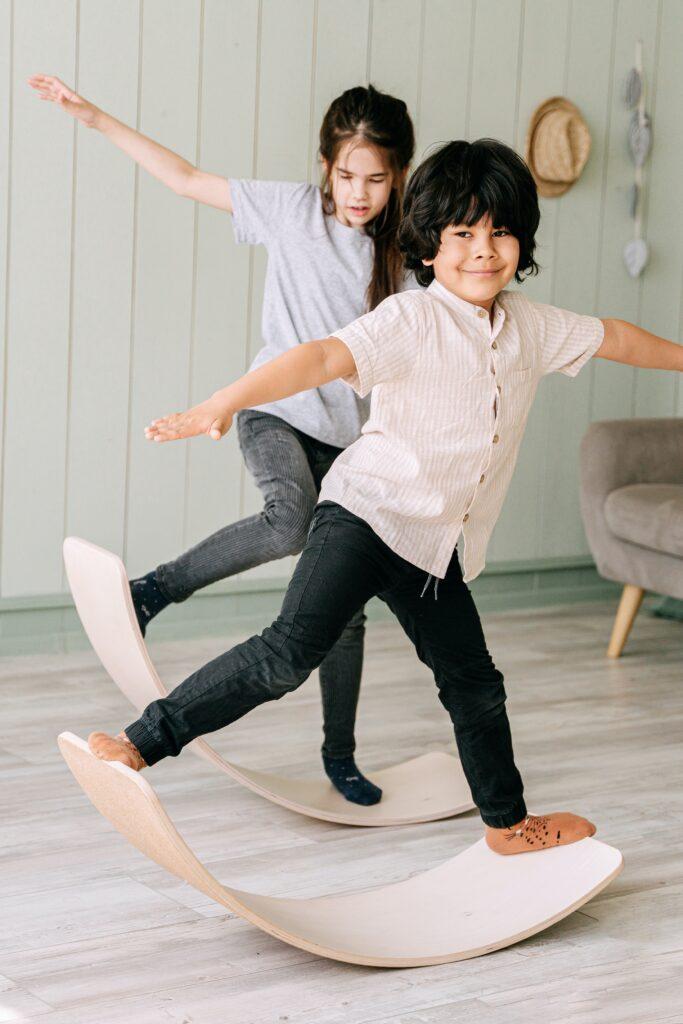
- 17. Balance Board: Used for stability and balance exercises.
Keep in mind that many beneficial calisthenics exercises don’t really necessitate any equipment at all, but this can certainly make your workouts more efficient. Calisthenics is all about beginning with simple bodyweight moves and gradually increasing in difficulty and intensity.
Without further ado, let’s get into the specifics of each Calisthenics Equipment’s and the benefits they provides.
Pull-Up Bar Exercises:
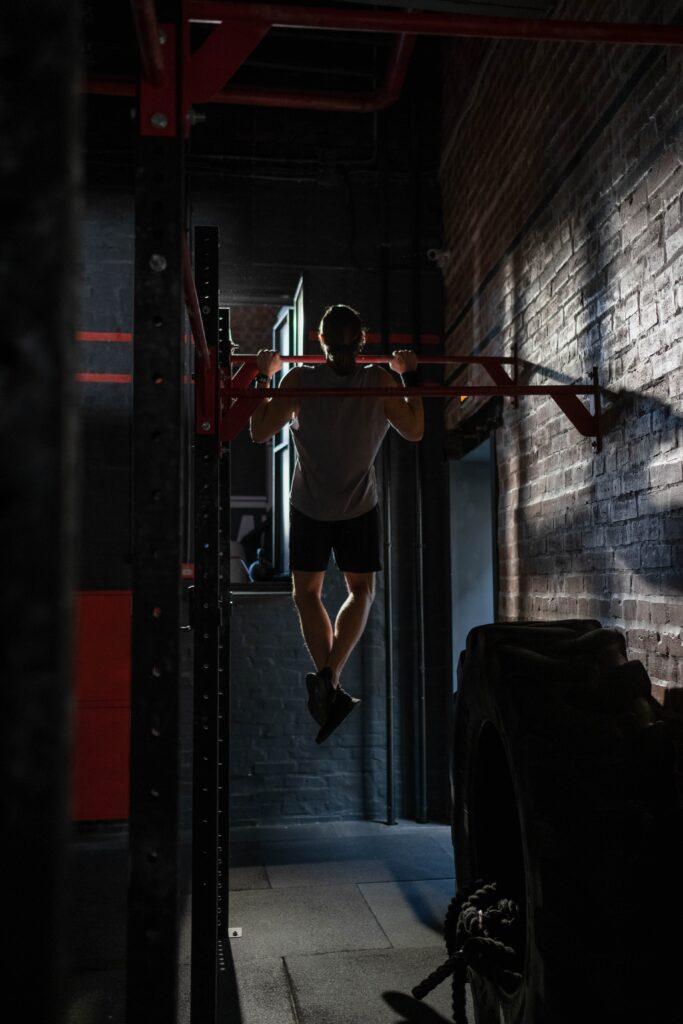
1. Pull-Ups:
Description: Grip the bar with palms facing away from you (overhand grip). Pull yourself up until your chin is over the bar, then lower back down.
Uses: Targets the latissimus dorsi (lats), biceps, brachialis, and brachioradialis. It also works the rhomboids, trapezius, and core to a lesser extent.
2. Chin-Ups:
Description: Grip the bar with palms facing you (underhand grip). Pull yourself up until your chin is over the bar.
Uses: Primarily works the biceps, brachialis, brachioradialis, and lats. Compared to pull-ups, chin-ups place more emphasis on the biceps.
3. Neutral Grip Pull-Ups:
Description: Grip the bar with palms facing each other (if the pull-up bar setup allows for it). Pull up in the same manner as standard pull-ups.
Uses: Works the lats, biceps, and brachialis, but with a neutral wrist position which can be more comfortable for some people.
4. Muscle-Ups:
Description: Start with a pull-up but continue to pull even after your chin passes the bar, transitioning into a dip and ending with your arms extended above the bar.
Uses: Engages lats, biceps, triceps, chest, and shoulders. It’s a compound move that combines a pull-up and a dip.
5. Hanging Leg Raises:
Description: Hang from the bar with arms extended. Keeping legs straight, raise them up in front of you as high as you can, ideally until they’re parallel with the ground or higher.
Uses: Targets the rectus abdominis, hip flexors, and obliques.
6. Hanging Knee Raises:
Description: Similar to leg raises, but you bend your knees and bring them toward your chest.
Uses: It primarily focuses on the lower rectus abdominis and hip flexors.
7. L-Sit Hang:
Description: While hanging from the bar, lift your legs up and hold them parallel to the ground, forming an ‘L’ shape with your body.
Uses: Engages the core, specifically the rectus abdominis, and hip flexors.
8. Windshield Wipers:
Description: Start by hanging on the bar and raise your legs until they’re parallel to the ground. Rotate them from left to right in a windshield wiper motion.
Uses: Works the obliques, rectus abdominis, and hip flexors.
9. Around the World Pull-Ups:
Description: As you pull yourself up, move in a semi-circular motion, going to one side and then the other.
Uses: Engages the lats, biceps, and other stabilizing muscles in a more dynamic fashion.
Benefits of Using a Pull-Up Bar:
1. Upper Body Strength: Pull-ups and related exercises are great for building strength in the arms, back, and shoulders.
2. Core Strength: Exercises like hanging leg raises or L-sits challenge the core muscles significantly.
3. Flexibility: Hanging from a bar and performing certain exercises can improve the range of motion and flexibility in the shoulders.
4. Grip Strength: Hanging from a bar, especially for prolonged periods or while doing pull-ups, enhances grip strength.
5. Functional Strength: Pull-up bar exercises help in building functional strength that translates well to everyday activities.
6. Convenience: A pull-up bar can be installed in many home setups, allowing for an effective workout without the need for a full gym.
Incorporating pull-up bar exercises into a regular workout routine can lead to significant improvements in upper body strength, posture, and overall athletic performance.
Parallel bars Exercises:
Parallel bars, often found in both calisthenics parks and gymnastics facilities, are versatile tools that allow for a wide range of exercises targeting various parts of the body. Here are the main exercises you can perform on parallel bars and their uses:

Parallel Bars Exercises:
1. Dips:
Description: Starting with arms straight and locked out, lower your body until your arms are at about a 90 degree angle, then press back up to the starting position.
Uses: Primarily targets the triceps, anterior deltoids, and pectoralis major (chest).
2. L Sit:
Description: While holding yourself up on the bars, keep your legs straight out in front of you, forming an ‘L’ shape with your body.
Uses: Engages the core, especially the rectus abdominis, as well as hip flexors.
3. Tuck Planche:
”Description: Hold yourself above the bars, but instead of having legs straight as in the L sit, tuck your knees towards your chest. The feet are off the ground.
Uses : Challenges the shoulders, triceps, and core muscles.
4. Straddle Planche :
Description : From an elevated position, extend both legs out to the sides while keeping them straight and off the ground.
Uses : Heavily engages the deltoids, triceps, lats, and core.
5. Planche :
Description : Holding yourself above the bars, keep your body straight and parallel to the ground from head to toe.
Uses : This advanced move activates the deltoids, triceps, lats, chest, and core muscles.
6. Handstand Push Ups :
Description : Get into a handstand position on the bars, then lower yourself down and push yourself back up.
Uses: Targets the deltoids, triceps, and upper chest. Also requires considerable balance and core stabilization.
7. Swing Throughs (or Shoot Throughs) :
Description : Starting in a support position, swing or “shoot” your legs through your arms and forward, then return to the starting position.
Uses : Provides cardiovascular benefits, while also engaging the core and shoulders.
8. Knee Raises :
Description : While holding yourself up on the bars, lift your knees towards your chest.
Uses : Targets the lower rectus abdominis and hip flexors.
9. Leg Raises :
Description : Hold yourself up and raise your legs straight up in front of you.
Uses : Engages the rectus abdominis and hip flexors.
10. Front Lever :
Description : Hold onto the bars and, with straight arms, lift your body until it’s parallel to the ground, with legs straight out in front.
Uses : Works the lats, deltoids, core, and hip flexors.
Benefits of Using Parallel Bars :
1. Whole Body Workout : Parallel bars can be used to target the upper body, core, and even parts of the lower body.
2. Core Stabilization : Many parallel bar exercises require a strong, engaged core for stabilization.
3. Functional Strength : Building strength using one’s own body weight can translate well to real world activities and tasks.
4. Flexibility & Mobility : Several movements, especially advanced ones, can help increase flexibility and mobility.
5. Skill Development : Exercises on parallel bars can be quite skill intensive, offering a combination of strength, balance, and technique training.
Incorporating parallel bar exercises into a fitness routine can offer diverse training adaptations, from strength gains to increased mobility and balance.
Calisthenics Equipment: Gymnastic Rings.
Gymnastic rings, also simply referred to as “rings”, offer a unique training modality because of their instability, which can make even basic exercises more challenging. This instability also places greater demands on the stabilizing muscles, leading to more comprehensive strength development. Here are the main exercises you can perform on gymnastic rings and their uses:
Gymnastic Ring Exercises:

1. Ring Pull Ups :
Description: Similar to regular pull ups, but performed on rings. The inherent instability of the rings makes the exercise more challenging.
Uses : Targets the latissimus dorsi (lats), biceps, brachialis, and brachioradialis, while also working the stabilizing muscles of the shoulders and core.
2. Ring Dips :
Description : Perform dips on the rings. The instability will require more engagement from the shoulders and chest.
Uses : Works the triceps, anterior deltoids, and pectoralis major (chest), with greater stabilization demands than parallel bar dips.
3. Ring push-ups:
Description : With the rings close to the ground, perform push ups. The instability requires greater muscle engagement.
Uses : Targets the chest, triceps, and deltoids, with added core and shoulder stabilization.
4. Ring Rows:
Description: Holding the rings, lean back with feet planted on the ground, then pull yourself up to the rings.
Uses: Engages the lats, biceps, rhomboids, and mid traps. It’s an excellent exercise for the posterior chain of the upper body.
5. Ring Muscle Ups:
Description : A combination of a pull up and a dip on the rings.
Uses : Engages lats, biceps, triceps, chest, and shoulders. It’s a compound movement that transitions from a pull to a push.
6. Ring L Sit:
Description: Holding yourself up on the rings, keep your legs straight out in front of you.
Uses: Challenges the core, especially the rectus abdominis, and hip flexors.
7. Ring Tuck to Inverted Hang:
Description: Start in a tuck position and then extend your body upwards into an inverted hang.
Uses: Engages the lats, shoulders, and core.
8. Ring Plank:
Description : Holding the rings close to the ground, maintain a plank position.
Uses: Primarily targets the core stabilizers, along with the shoulders and chest.
9. Front Lever:
Description: Holding onto the rings, keep your body straight and parallel to the ground, facing upwards.
Uses: Strongly engages the lats, deltoids, core, and hip flexors.
10. Back Lever:
Description : Holding onto the rings, keep your body straight and parallel to the ground, facing downward.
Uses : Challenges the lats, deltoids, and core.
11. Iron Cross:
Description : An advanced move where you hold your body parallel to the ground with arms extended straight to the sides.
Uses : This move heavily engages the chest, shoulders, and lats.
12. Ring Flyes:
Description: Start in a push up position but, instead of pressing down, open your arms wide and then squeeze them back together.
Uses: It primarily targets the chest muscles, especially the pectoralis major.
Benefits of Using Gymnastic Rings :
1. Versatility : Rings can be adjusted to various heights, allowing a wide range of exercises from pull movements to push movements.
2. Increased Stabilization : The unstable nature of the rings activates stabilizer muscles, leading to more balanced muscle development.
3. Joint Health : The freedom of movement can be easier on the joints, especially the shoulders, since you’re not locked into a fixed path.
4. Functional Strength : Due to the high demand for stabilization and engagement of multiple muscle groups, rings help in developing functional strength.
5. Skill Development : Training on rings can be both strength intensive and skill intensive, combining physical exertion with coordination and balance.
Incorporating gymnastic ring exercises into a workout routine can aid in developing strength, balance, coordination, and proprioception in ways that fixed apparatus might not offer.
Calisthenics Equipment: Push-Up Handles.

Push-Up handles, also known as push up bars or stands, are tools designed to enhance the standard push up exercise. They typically consist of handles that elevate your palms off the ground, allowing for a deeper range of motion and sometimes reducing strain on the wrists. Here are the primary exercises and variations you can perform with push up handles and their uses:
Push-Up Handles Exercises:
1. Standard Push-Up :
Description : Place the handles shoulder width apart, grip them and perform a push up as you normally would, but with the added depth the handles allow.
Uses : Targets the chest (pectoralis major), shoulders (anterior deltoids), and triceps. The deeper range of motion can result in a more intense chest activation.
2. Wide Push-Up :
Description : Place the handles wider than shoulder width. This emphasizes the outer chest more.
Uses : Focuses more on the pectoralis major, especially the outer portion, with less emphasis on the triceps.
3. Close Grip Push-Up :
Description : Position the handles closer together, under the chest. This variation targets the triceps more heavily.
Uses : Mainly engages the triceps, but still works the chest and shoulders.
4. Decline Push-Up :
Description : Place your feet on an elevated surface while your hands grip the push up handles. This shifts more weight onto the upper chest and shoulders.
Uses : Emphasizes the upper chest (clavicular head of the pectoralis major) and anterior deltoids.
5. Incline Push-Up :
Description : With the handles on an elevated surface, perform a push up with your feet on the ground. This variation targets the lower chest more.
Uses : Focuses more on the lower portion of the pectoralis major.
6. Pike Push-Up :
Description : Start in a pike position, with your hips high and aiming to bring the top of your head down between the handles.
Uses : Targets the shoulders, especially the deltoids, simulating an overhead press.
7. Single Leg Push-Up :
Description : While performing a push up on the handles, raise one leg off the ground.
Uses : Besides engaging the chest, triceps, and shoulders, this also challenges core stability.
Benefits of Using Push-Up Handles:
1. Increased Range of Motion : The elevated position allows for a deeper stretch in the chest muscles, potentially leading to increased muscle activation and development.
2. Wrist Comfort : Push-Up handles can reduce strain on the wrists by keeping them in a neutral position.
3. Versatility : They allow for various push up variations, targeting different muscle groups.
4. Enhanced Grip Strength : Gripping the handles can also help in enhancing grip strength over time.
5. Improved Shoulder Stability : The deeper range of motion requires more shoulder stability, which can help strengthen the stabilizing muscles around the shoulder joint.
6. Portability : Push-Up handles are usually compact and lightweight, making them easy to transport and use in various settings.
Incorporating Push-Up handles into a routine can offer a refreshing twist to the traditional push up, adding variety and potentially increasing the exercise’s benefits.
Calisthenics Equipment: Resistance bands
Resistance bands are versatile fitness tools that come in a variety of strengths, lengths, and types, such as looped bands, therapy bands, and tube bands with handles. They offer resistance throughout an exercise’s entire motion and can be used to assist or challenge movements. Here’s a list of exercises you can perform with resistance bands and their uses:

Resistance Bands Exercises:
1. Banded Squats :
Description : Stand on the band with feet shoulder width apart and hold the ends at shoulder height. Squat as usual.
Uses : Strengthens the quadriceps, hamstrings, glutes, and core.
2. Banded Deadlifts :
Description : Stand on the band with feet shoulder width apart, holding the ends. Hinge at the hips to simulate a deadlift motion.
Uses : Targets the hamstrings, glutes, lower back, and core.
3. Banded Rows :
Description : Secure the band around a fixed object and hold an end in each hand. Pull the band towards you, squeezing your shoulder blades.
Uses : Works the rhomboids, lats, biceps, and upper traps.
4. Banded Push Ups :
Description : Wrap the band around your back and hold an end in each hand, perform push ups.
Uses : Adds resistance to the push up motion, targeting the chest, triceps, and shoulders.
5. Banded Bicep Curls :
Description : Stand on the band with feet shoulder width apart, holding the ends. Curl upwards.
Uses : Strengthens the biceps.
6. Banded Tricep Extensions :
Description : Hold one end of the band overhead, and the other end behind your back. Extend your arm to straighten it.
Uses : Targets the triceps.
7. Banded Leg Abduction :
Description : Tie the band around your ankles and stand with feet shoulder width apart. Move one leg out to the side against the band’s resistance.
Uses : Engages the hip abductors, especially the gluteus medius.
8. Banded Face Pulls :
Description : Secure the band at chest height and pull it towards your face, separating the hands and engaging the rear deltoids.
Uses : Strengthens the rear deltoids, rhomboids, and upper traps.
9. Banded Pallof Press :
Description : Secure the band at chest height, stand perpendicular to it holding the band with both hands. Extend your arms straight out, resisting the band’s pull.
Uses : Engages the core, especially the obliques.
10. Banded Lateral Walk :
Description : Place the band around your thighs or ankles, squat slightly, and walk side to side.
Uses : Strengthens the hip abductors and glutes.
Benefits of Using Resistance Bands:
1. Adaptability : Suitable for all fitness levels, as bands come in different resistance levels.
2. Full body Workout : Can be used to target almost every major muscle group.
3. Versatility : Useful for strength training, flexibility, rehabilitation, and more.
4. Joint Friendly : Provides resistance without heavy weights, which can be easier on the joints.
5. Cost Effective : Generally cheaper than other fitness equipment.
6. Portability : Lightweight and compact, making them ideal for travel or home use.
7. Functional Strength : The bands’ resistance can mimic real world resistance, which helps in training muscles in ways they are used in daily tasks.
Using resistance bands can add variety to a workout routine, and due to their unique tension curve, they can sometimes activate muscles in ways that free weights can’t.
Calisthenics equipment: Ab Wheel Exercise
The ab wheel, or ab roller, is a simple but effective tool for developing core strength and stability. It consists of a wheel with handles on either side. While it primarily targets the abs, it also engages other muscles, providing a comprehensive core workout. Here’s a detailed look at the primary exercise performed with the ab wheel and its uses:

Ab Wheel Exercise:
Ab Wheel Rollout:
Description:
1. Start on your knees with the ab wheel in front of you, gripping each handle.
2. Engage your core and roll the wheel forward, extending your body into a straight position.
3. Go as far forward as you can without arching your back or letting your hips sag, then pull yourself back to the starting position using your core.
4. For an added challenge, advanced users can perform the rollout from a standing position, although this requires significant core strength and stability.
Uses:
Primary Target: Rectus abdominis (the “six pack” muscle).
Secondary Targets: Obliques, transverse abdominis, lats, deltoids, chest, and the muscles of the lower back.
Stabilizers: Engages the muscles around the shoulders, arms, and even some leg muscles to stabilize the movement.
Benefits of Using the Ab Wheel:
1. Comprehensive Core Engagement: Unlike some ab exercises that isolate specific muscles, the ab wheel rollout requires the integrated effort of all the major core muscles.
2. Improved Core Stability: Regular use can improve stability, which is vital for balance, posture, and functional strength in daily activities and sports.
3. Enhanced Functional Strength: As the movement mimics the body’s natural motion in activities like lifting or reaching forward, it can improve functional strength.
4. Compact and Portable: The ab wheel is small and lightweight, making it convenient for home workouts or travel.
5. Cost Effectiveness: Generally, ab wheels are affordable, providing an effective workout without a significant investment.
6. Variability: While the basic movement remains the rollout, you can introduce variations, such as oblique rollouts (angling the wheel to the side), to target different muscle groups.
7. Supports Back Health: A strong core can provide better support for the spine, potentially reducing the risk of back pain or injuries.
However, it’s essential to note that the Ab wheel rollout can be demanding, especially for beginners. Proper form is crucial to preventing potential injuries, particularly to the lower back. If you’re new to the ab wheel, it might be helpful to start with shorter rollouts or use the wheel against a wall to limit the rollout distance, gradually increasing the range as your strength and technique improve.
Calisthenics equipment: The Jump rope
The jump rope, a simple yet potent fitness tool, offers a combination of benefits from cardiovascular conditioning to coordination development. Here’s a breakdown of jump rope exercises and their uses:

Jump Rope Exercises:
1. Basic Jump:
Description: Jump with both feet simultaneously, maintaining a steady rhythm. Ensure that your jumps are low to the ground.
Uses: Improves cardiovascular conditioning, endurance, and basic coordination.
2. Alternate Foot Jump (Running in Place):
Description: Alternate jumping on each foot, simulating a running motion.
Uses: Boosts cardiovascular conditioning and challenges coordination a bit more than the basic jump.
3. Double Under:
Description: Turn the rope twice under your feet in a single jump.
Uses: Increases cardiovascular intensity, improves timing, and challenges coordination.
4. Criss Cross:
Description: Cross and uncross your arms as you jump, which makes the rope form an “X” under your feet.
Uses: Enhances arm coordination and agility.
5. High Knees:
Description: Bring your knees up towards your chest while jumping.
Uses: Engages the core, especially the lower abs, and improves cardiovascular conditioning.
6. Single Leg Jump:
Description: Hop continuously on one leg.
Uses: Strengthens leg muscles, improves balance, and boosts endurance.
7. Boxer Skip:
Description: Alternate between placing one heel in front and then shifting weight back and forth between feet, creating a rhythmic bounce.
Uses: Often used in boxing for footwork training, it’s great for improving rhythm and coordination.
8. Heel Taps:
Description: Alternate tapping the heels forward while jumping.
Uses: Challenges coordination and engages the anterior tibialis muscle in the shins.
Benefits of Using a Jump Rope:
1. Cardiovascular Conditioning: One of the most effective cardiovascular exercises, it can improve heart and lung health.
2. Burns Calories: Jumping rope can burn upwards of 10 15 calories per minute, making it an efficient exercise for weight loss.
3. Improves Coordination: Regularly practicing different jump rope techniques can significantly improve hand eye foot coordination.
4. Full body Workout: Engages the legs, core, and arms, providing a comprehensive workout.
5. Compact and Portable: Jump ropes are lightweight and can easily be packed in a bag, making them perfect for workouts on the go.
6. Bone Density: The impact from jumping can improve bone density, reducing the risk of osteoporosis.
7. Affordable: Jump ropes are one of the most cost effective fitness tools available.
8. Versatility: Suitable for high intensity interval training (HIIT), strength training warm ups, or standalone cardio sessions.
9. Agility and Speed: Regular use can improve overall agility, quickness, and foot speed, which is beneficial for various sports.
10. Mental Workout: Complex jump rope patterns or techniques can challenge the mind, aiding in cognitive development and concentration.
While jumping rope is highly beneficial, it’s essential to use the proper technique and ensure you have suitable footwear to minimize the risk of injury. Starting slow and gradually increasing intensity can help newcomers avoid unnecessary strain.
Calisthenics equipment: A plyometric box
A plyometric box, often simply referred to as a “plyo box,” is a piece of fitness equipment designed for plyometric exercises. Plyometrics, also known as “jump training,” involves explosive movements to develop muscle power, strength, and speed. Here’s an overview of exercises you can perform with a plyometric box and their uses:
Plyometric Box Exercises:
1. Box Jumps:
Description: Start in a squat position and explosively jump onto the box, landing softly with knees slightly bent. Step or jump back down.
Uses: Builds explosive power in the legs, improves vertical jump, and engages the core.
2. Step Ups:
Description: Step up onto the box one foot at a time, then step back down. Alternate leading legs.
Uses: Strengthens the quadriceps, hamstrings, and glutes while also improving balance.
3. Box Squats:
Description: Begin by standing in front of the box. Lower into a squat until your glutes touch the box, then push back up to a standing position.
Uses: Targets the quadriceps, hamstrings, and glutes, emphasizing control and depth in the squat movement.
4. Bulgarian Split Squats:
Description: Place one foot behind you on the box while the other foot is positioned forward. Lower into a lunge, ensuring your front knee doesn’t pass your toes.
Uses: Strengthens the quadriceps, hamstrings, glutes, and challenges stability and balance.
5. Depth Jumps:
Description: Stand on the box, step off, and as soon as you touch the ground, explosively jump as high as you can.
Uses: Develops reactive strength and power in the legs.
6. Incline Push Ups:
Description: Place hands on the box and feet on the ground, then perform a push up.
Uses: Targets the upper chest and shoulders more than a regular push up.
7. Decline Push Ups:
Description: Place feet on the box and hands on the ground, then perform a push up.
Uses: Puts more emphasis on the lower chest and increases core engagement.
8. Box Dips:
Description: With your back to the box, place your hands on the edge, extending your legs out in front. Lower your body by bending your elbows, then push back up.
Uses: Strengthens the triceps and anterior deltoids.
9. Burpee Box Jumps:
Description: Perform a burpee in front of the box, and as you come up from the burpee, jump onto the box.
Uses: Enhances cardiovascular conditioning, builds explosive leg power, and engages the entire body.
Benefits of Using a Plyometric Box:
1. Power Development: Plyo box exercises are designed to increase muscle power, which improves athletic performance in sports requiring explosive movements.
2. Functional Strength: The exercises mimic natural movement patterns, enhancing strength that is beneficial for daily activities.
3. Versatility: The plyo box can be used for a variety of exercises targeting different muscle groups.
4. Cardiovascular Conditioning: Many plyometric exercises elevate the heart rate quickly, offering cardiovascular benefits.
5. Improved Bone Density: Plyometric exercises can help increase bone density due to their weight bearing nature.
6. Enhanced Balance and Stability: Exercises like step ups and Bulgarian split squats challenge and improve balance and stability.
7. Joint Health: Plyometric exercises can strengthen the muscles surrounding joints, potentially reducing the risk of joint related injuries.
It’s crucial to ensure proper form when using a plyometric box to minimize the risk of injuries. Always start with a height you’re comfortable with, and as your strength and confidence increase, you can progress to higher boxes or more complex exercises.
Calisthenics equipment: Weighted Vest
A weighted vest is a piece of fitness equipment that is worn like a regular vest but has pockets to hold small weights. It’s designed to add extra resistance to bodyweight exercises, aerobic activities, and even everyday tasks. By increasing the load on your body, you can improve strength, endurance, and burn more calories during workouts. Below are some exercises and their uses when performed with a weighted vest:

Weighted Vest Exercises:
1. Walking or Running :
Description: Simply walk or run as you normally would while wearing the vest.
Uses: Increases cardiovascular intensity, burns more calories, and strengthens the leg muscles more than walking or running without additional weight.
2. Push Ups :
Description: Perform standard push ups with the vest on.
Uses: Adds extra resistance to the exercise, targeting the chest, triceps, and shoulders.
3. Squats:
Description: Execute regular bodyweight squats with the vest.
Uses: Enhances strength training for the quadriceps, hamstrings, and glutes.
4. Lunges:
Description: Complete forward, reverse, or lateral lunges while wearing the vest.
Uses: Increases leg muscle engagement and calorie burn.
5. Pull Ups/Chin Ups:
Description: Perform pull ups or chin ups with the vest on.
Uses: Provides additional resistance, making the upper body work harder.
6. Box Jumps:
Description: With the vest on, perform box jumps as you would without it.
Uses: Enhances explosive power and muscle engagement in the legs.
7. Planks:
Description: Hold a plank position, either on your hands or forearms.
Uses: Increases core engagement and strength due to the added weight.
8. Burpees:
Description: Perform the burpee exercise while wearing the vest.
Uses: Intensifies the overall challenge, benefiting cardiovascular health and muscle engagement.
9. Mountain Climbers:
Description: Start in a plank position and bring your knees towards your chest alternately.
Uses: Boosts the exercise’s cardiovascular component and strengthens the core.
10. Jumping Jacks:
Description: Execute jumping jacks as usual while wearing the vest.
Uses: Provides a greater cardiovascular challenge and increases calorie burn.
Benefits of Using a Weighted Vest:
1. Adaptable Resistance: You can adjust the weight according to your fitness level and the demands of the exercise.
2. Functional Strength: It can enhance functional strength, aiding in daily tasks and athletic performance.
3. Bone Density: The added weight can help improve bone density, reducing the risk of osteoporosis.
4. Calorie Burn: Activities performed with a weighted vest can burn more calories than without.
5. Versatility: It can be used in a variety of exercises, from strength training to cardiovascular workouts.
6. Posture: Using a weighted vest can also promote better posture, as the user will typically engage their core muscles to stay upright.
7. Progressive Overload: Allows for progression in bodyweight exercises by adding resistance, which can be crucial for strength and muscle development.
8. Cardiovascular Fitness: Increases the intensity of cardio exercises, leading to improved cardiovascular fitness.
Remember to always ensure proper form during exercises to minimize the risk of injury. Start with a lighter weight in the vest, and gradually increase it as your strength and endurance improve. Before beginning any exercise regimen, especially with added resistance, it’s beneficial to consult a fitness professional or healthcare provider.
Calisthenics equipment: Parallettes bars
Parallettes, sometimes also known as mini bars, are a versatile piece of gym equipment that are used for a variety of calisthenics and gymnastics exercises. They are typically made of metal, wood, or plastic and are designed to raise the body off the ground, providing a greater range of motion during exercises and reducing wrist strain. Here’s an overview of exercises you can perform with parallettes and their uses:
Parallettes Exercises:
1. L Sit:
Description: Sit between the parallettes, press down into the bars, and lift your legs straight out in front of you, forming an “L” shape.
Uses: Strengthens the core, hip flexors, and triceps, and improves balance and shoulder stability.
2. Tuck Planche:
Description: With hands on the parallettes, lift your body and tuck your knees into your chest, keeping feet off the ground.
Uses: Targets the shoulders, chest, triceps, and core, improving balance and strength.
3. Push Ups:
Description: Perform push ups with your hands on the parallettes, allowing for a deeper range of motion.
Uses: Engages the chest, shoulders, triceps, and core more than regular push ups due to the increased range of motion.
4. Dips:
Description: Place one hand on each parallette, lift your body, and lower it by bending your elbows, then press back up.
Uses: Strengthens the triceps, chest, and front deltoids.
5. Handstand Press:
Description: Start in a forward bend with your hands on the parallettes and then press your body upwards into a handstand.
Uses: Works the shoulders, triceps, and core, while improving balance and shoulder stability.
6. V Sit:
Description: Begin in an L Sit, then lift your legs higher, aiming for a V shape.
Uses: Intensely targets the core and hip flexors and challenges shoulder stability.
7. Shoot Through:
Description: Start in a push up position on the parallettes. Bring one leg through and forward, sitting back on the opposite side, then return to the start position.
Uses: Works the core, shoulders, and triceps and helps in improving mobility and coordination.
8. Pike Hold:
Description: Begin in a push up position and then raise your hips, bringing your body into an inverted “V” shape.
Uses: Strengthens the shoulders, triceps, and core.
Benefits of Using Parallettes:
1. Enhanced Range of Motion: The elevation allows for a deeper range in many exercises, which can lead to increased muscle engagement.
2. Wrist Health: The neutral grip (palms facing each other) on parallettes can be easier on the wrists compared to flat ground exercises.
3. Versatility: Suitable for strength training, balance work, and flexibility exercises.
4. Core Activation: Many parallette exercises demand strong core engagement.
5. Upper Body Strength: They can greatly enhance upper body strength, especially in the shoulders, triceps, and chest.
6. Functional Fitness: Exercises mimic natural movement patterns, increasing functional strength and mobility.
7. Skill Development: Parallettes are instrumental for progressing to advanced calisthenics and gymnastics moves.
It’s essential to master the basics and ensure proper form when using parallettes to minimize the risk of injury. Beginners should start with simpler exercises, gradually progressing to more advanced moves as strength, balance, and confidence increase.
Calisthenics equipment: Ankle Weights
Ankle weights are weights that can be strapped around your ankles. They add resistance to lower body exercises, making muscles work harder and potentially accelerating strength and endurance gains. Here’s a list of exercises you can perform with ankle weights and their uses:

Ankle Weights Exercises:
1. Leg Lifts:
Description: Lying on your side, lift your top leg upwards, then lower it without letting it touch the resting leg.
Uses: Targets the outer thigh muscles (abductors).
2. Donkey Kicks:
Description: Start on all fours, then kick one leg back and up, keeping the knee bent.
Uses: Strengthens the glutes.
3. Knee Tucks:
Description: Lie on your back with legs in the air. Bend your knees towards your chest, then extend them straight again.
Uses: Engages the lower abdominals.
4. Flutter Kicks:
Description: Lying on your back, lift your legs a few inches off the ground and kick them up and down alternately.
Uses: Works the hip flexors and lower abs.
5. Leg Extensions:
Description: Sit on a chair with your feet off the ground, then extend your legs out straight and bring them back in.
Uses: Strengthens the quadriceps.
6. Standing Leg Lifts (Back):
Description: Stand up straight, then extend one leg straight back without bending the knee.
Uses: Targets the glutes and hamstrings.
7. Standing Leg Lifts (Side):
Description: Stand up straight and lift one leg to the side.
Uses: Works on the abductor muscles of the thighs.
8. Hamstring Curls:
Description: Lying prone, bend your knees to bring your heels towards your buttocks.
Uses: Engages the hamstrings.
9. Walking or Running:
Description: Walk or jog with the ankle weights on.
Uses: Increases the intensity of the exercise, working on leg muscles and burning more calories.
10. Bicycle Crunches:
Description: Lying on your back, perform bicycle movements with your legs while simultaneously bringing opposite elbow to the knee.
Uses: Strengthens the core and challenges the legs more due to the added weight.
Benefits of Using Ankle Weights:
1. Increased Resistance: Enhances the intensity of exercises, leading to improved muscle tone and strength.
2. Versatility: Can be used for a variety of workouts, both standing and on the floor.
3. Improved Endurance: As the muscles adapt to the added resistance, endurance may improve.
4. Functional Strength: Helps in building strength that can be beneficial for daily activities.
5. Calorie Burn: Exercises with added resistance can burn more calories.
6. Cost Effective: They’re generally affordable and can be a valuable addition to home workouts.
7. Compact and Portable: Ankle weights are easy to carry and store, making them suitable for travel workouts.
However, it’s essential to use ankle weights with caution. They can increase the risk of strain or injury if used excessively or improperly. Start with lighter weights and gradually increase as your strength improves. If you have joint problems, especially in the knees, hips, or lower back, consult with a fitness professional or physiotherapist before incorporating ankle weights into your routine.
Calisthenics equipment: Wall
Using a wall for exercises can be an effective way to add resistance, improve balance, and target various muscle groups. Here are some exercises you can perform using a wall and their associated benefits:

Wall Exercises:
1. Wall Sit:
Description: With your back against the wall, slide down until your thighs are parallel to the ground, creating a 90 degree angle with your knees. Hold the position.
Uses: Strengthens the quadriceps, hamstrings, and glutes. Also helps improve endurance.
2. Wall Push Ups:
Description: Face the wall with your hands pressed against it at shoulder height. Perform push ups by leaning into the wall and pushing yourself back to the starting position.
Uses: Targets the chest, triceps, and shoulders. Suitable for beginners or as a less strenuous alternative to traditional push ups.
3. Wall Plank:
Description: Start in a plank position with your feet on the ground and your hands on the wall. Hold the position.
Uses: Engages the core muscles and improves shoulder stability.
4. Wall Bridges:
Description: Lie on the ground with your feet up on the wall. Lift your hips off the ground to form a straight line from your feet to your shoulders.
Uses: Works the glutes, hamstrings, and lower back.
5. Wall Handstand:
Description: With your hands on the ground, kick up into a handstand position against the wall.
Uses: Strengthens the shoulders, arms, and core. Also helps improve balance.
6. Wall Slides:
Description: Stand with your back against the wall, arms raised to shoulder height and elbows bent at 90 degrees. Slide your arms up and down the wall.
Uses: Enhances shoulder mobility and works the scapular stabilizers.7
7. Wall Leg Lifts
Description: Lie on your side close to the wall with your back touching it. Lift the leg closest to the wall upwards.
Uses: Targets the inner thighs and hip adductors.
8. Wall Squat with Ball Squeeze:
Description: Place a soft ball or pillow between your thighs and perform a wall sit. While holding the squat position, squeeze the ball with your thighs.
Uses: Engages the inner thighs in addition to the quadriceps, hamstrings, and glutes.
Benefits of Using a Wall for Exercises:
1. Support and Stability: The wall provides a stable surface to lean on or push against, making exercises more controlled and accessible for various fitness levels.
2. Versatility: The wall can be used for both strength and flexibility exercises.
3. Space Efficiency: Wall exercises are suitable for small spaces where large equipment or extensive floor space might not be available.
4. Safety: For those new to exercise or returning after injury, wall exercises can be a safer option to maintain control and minimize the risk of falling.
5. Full Body Engagement: Many wall exercises engage multiple muscle groups, providing comprehensive workouts.
6. Improved Posture: Some wall exercises promote better posture by aligning the spine and engaging the core.
When performing wall exercises, it’s vital to maintain proper form and alignment. As always, consult with a fitness professional if you’re unsure about the correct technique or if the exercise is suitable for your individual circumstances.
Calisthenics equipment: Yoga Mat
A yoga mat is primarily designed to provide grip, cushioning, and insulation during yoga practices. However, it’s not limited to just yoga; it can also be utilized for various exercises that require a soft and non slip surface. Here are some exercises you can perform on a yoga mat and their associated benefits:

Yoga Mat Exercises:
1. Plank:
Description: Hold a push up position, engaging your core and ensuring your body forms a straight line from head to heels.
Uses: Strengthens the core, shoulders, and back. Improves posture and stability.
2. Push Ups:
Description: From a plank position, lower your body towards the mat and push yourself up.
Uses: Works the chest, shoulders, and triceps. Engages the core for stability.
3. Glute Bridges:
Description: Lie on your back with knees bent and feet flat on the mat. Lift your hips towards the ceiling, squeezing the glutes.
Uses: Strengthens the glutes, hamstrings, and lower back.
4. Mountain Climbers:
Description: Starting in a plank position, bring one knee towards your chest and alternate quickly.
Uses: Cardiovascular exercise that also engages the core, shoulders, and legs.
5. Russian Twists:
Description: Sit with your knees bent and feet on the floor. Lean back slightly, holding your hands together, and rotate your torso to tap the ground beside you alternately.
Uses: Strengthens the obliques and overall core.
6. Leg Raises:
Description: Lie on your back, keeping legs straight, lift them off the ground, and lower without touching down.
Uses: Targets the lower abdominals.
7. Child’s Pose:
Description: Sit on your heels, stretch your arms out in front, and lower your forehead to the mat.
Uses: A restorative yoga pose that stretches the back and helps in relaxation.
8. Cobra Pose:
Description: Lie face down and press your hands into the mat below your shoulders, lifting your chest.
Uses: Stretches the chest, shoulders, and abdomen. Strengthens the back.
9. Lunges:
Description: Step forward into a lunge position, ensuring your front knee aligns with your ankle.
Uses: Works the quadriceps, hamstrings, and glutes.
10. Seated Forward Bend:
Description: Sit with legs extended straight, hinge at the hips to lean forward, reaching towards your feet.
Uses: Stretches the hamstrings and lower back.
Benefits of Using a Yoga Mat for Exercises:
1. Grip and Stability: Provides a non slip surface, which is crucial for poses and exercises that require balance.
2. Cushioning: Offers a padded surface, protecting joints during exercises.
3. Boundaries: Defines personal space, especially in group classes.
4. Hygiene: Acts as a barrier between you and the floor, keeping sweat and germs off communal surfaces.
5. Portability: Easy to roll up and carry, allowing for a versatile workout location.
6. Improved Technique: The soft but firm surface can help in maintaining better form during exercises.
7. Versatility: Apart from traditional exercises, it’s perfect for pilates, stretching, meditation, and other floor based activities.
When performing exercises on a yoga mat, ensure the mat is laid flat without any wrinkles to avoid tripping or losing balance. Additionally, choose a mat with appropriate thickness and material based on the exercises you intend to do most often.
Calisthenics equipment: Sliders disc
Exercise Sliders, also known as gliding discs, are flat, smooth discs typically made of plastic or similar material. They are used to add an element of stability challenge to workouts, enhancing the intensity and engagement of various muscles. Here are some exercises that can be performed using sliders and their associated benefits:
Slider Exercises:
1. Mountain Climbers:
Description: Start in a plank position with each foot on a slider. Bring one knee towards your chest, then slide it back and alternate legs.
Uses: Cardiovascular workout that also engages the core, shoulders, and legs.
2. Lateral Lunges:
Description: Stand with one foot on a slider. Push that foot to the side, bending the other knee into a lunge while keeping the sliding leg straight.
Uses: Targets the inner thighs (adductors) and works on the quads and glutes.
3. Pike:
Description: Begin in a plank position with both feet on sliders. Pull both feet towards your hands, lifting your hips to the ceiling.
Uses: Strengthens and engages the abdominals.
4. Sliding Plank to Knee Tuck:
Description: From a plank position with both feet on sliders, pull both knees towards your chest.
Uses: Engages the core, especially the lower abdominals.
5. Single Leg Sliding Squat:
Description: Stand with one foot on a slider. Slide that foot forward or backward as you lower into a squat on the stationary leg.
Uses: Works the quads, hamstrings, and glutes.
6. Bear Crawl:
Description: Start in a quadruped position with both hands under the shoulders and knees under the hips. Place sliders under feet. Move forward or backward by sliding one hand and the opposite foot at a time.
Uses: Engages the core, shoulders, and quadriceps.
7. Sliding Push Ups:
Description: Begin in a plank position with one hand on a slider. As you lower into a push up, slide that hand outward, then pull it back in as you push up.
Uses: Strengthens the chest, shoulders, triceps, and core.
8. Hamstring Curls:
Description: Lie on your back with knees bent and both feet on sliders. Lift your hips into a bridge position, then slide your feet out and back in.
Uses: Targets the hamstrings and glutes.
Benefits of Using Sliders in Workouts:
1. Core Engagement: Sliders demand stability, which requires a lot of core engagement, enhancing abdominal workouts.
2. Low Impact: Sliders reduce the impact on joints, making exercises gentler for those with joint concerns.
3. Versatility: They can be used for a variety of exercises targeting both the upper and lower body.
4. Portability: Sliders are compact and lightweight, making them easy to pack and use anywhere.
5. Improved Balance and Stability: The unstable nature of the sliding motion forces the body to balance, strengthening stabilizing muscles.
6. Increased Intensity: They can amplify the intensity of regular bodyweight exercises.
7. Functional Fitness: Many slider exercises mimic natural body movements, improving functional strength.
When using sliders, it’s essential to maintain proper form to maximize benefits and prevent injuries. On carpeted surfaces, the smooth side of the slider should face down, while on harder surfaces, the soft side should face down. If you’re new to using sliders, starting with basic exercises and progressing as you gain strength and stability is advisable.
Calisthenics equipment: Suspension trainers
Suspension trainers, such as the TRX system, are versatile tools that utilize gravity and the user’s body weight to facilitate hundreds of exercises. These trainers consist of adjustable straps with handles and can be anchored to a secure point like a door, beam, or specialized stand. Here are some exercises you can perform using suspension trainers and their associated benefits:

Suspension Trainer Exercises:
1. TRX Row:
Description: Facing the anchor point, grasp the handles with palms facing each other. Lean back, keeping your body straight, and pull yourself up by squeezing the shoulder blades together.
Uses: Strengthens the back, biceps, and core.
2. TRX Push Up:
Description: With your back to the anchor point, place your feet in the stirrups. Perform a push up.
Uses: Targets the chest, triceps, shoulders, and core.
3. TRX Pistol Squat:
Description: Stand on one leg while holding onto the handles. Perform a one legged squat.
Uses: Strengthens the quadriceps, hamstrings, glutes, and enhances balance.
4. TRX Mountain Climber:
Description: Start in a plank position with your feet in the stirrups. Bring one knee towards your chest and alternate quickly.
Uses: Engages the core, shoulders, and provides a cardiovascular workout.
5. TRX Lunge:
Description: Place one foot in a stirrup behind you and lunge forward with the other leg.
Uses: Works the quadriceps, hamstrings, glutes, and calves.
6. TRX Plank:
Description: Start in a hands plank position with feet in the stirrups. Keep your body straight and engage the core.
Uses: Strengthens the core and shoulders.
7. TRX T Y I Pull:
Description: Face the anchor point holding the handles. Lean back and pull your arms into a “T” shape, then “Y” shape, and finally an “I” shape.
Uses: Strengthens the upper back, rear deltoids, and improves shoulder mobility.
8. TRX Bicep Curl:
20
Uses: Targets the biceps.
9. TRX Tricep Extension:
Description: Face away from the anchor point, holding the handles above your head. Lean forward and extend your arms straight.
Uses: Targets the triceps.
Benefits of Using Suspension Trainers:
1. Full Body Workout: Suspension trainers can be used to work almost every muscle in the body.
2. Core Activation: Almost all suspension trainer exercises require core engagement, leading to a strong and stable midsection.
3. Versatility: Suitable for all fitness levels and can be easily adjusted to increase or decrease the exercise’s difficulty.
4. Improves Balance and Stability: The unstable nature of suspension trainers forces the body to stabilize, working on the smaller stabilizing muscles.
5. Functional Strength: Many exercises on suspension trainers mimic real world movements, improving functional fitness.
6. Portability: Suspension trainers are lightweight and can be set up anywhere, making them perfect for travel or home workouts.
7. Joint Health: The exercises are low impact, reducing the strain on joints.
Always ensure that the suspension trainer is securely anchored to avoid injury. If you’re new to suspension training, start with basic movements and progressively increase the intensity as you become more familiar and stronger. It might also be beneficial to work with a trainer initially to ensure correct form and technique.
Calisthenics equipment: Battling ropes
Battling ropes, often just called “battle ropes”, are thick, heavy ropes that can be used for a dynamic, high intensity workout. They are typically anchored to a wall or pole, and users hold the free ends. Here are some exercises you can perform with battling ropes and their associated benefits:
Battling Ropes Exercises:
1. Double Wave:
Description: Stand facing the anchor, holding a rope in each hand. Move both arms up and down simultaneously to create synchronized waves in the ropes.
Uses: Engages the shoulders, arms, and core and provides a cardiovascular workout.
2. Alternating Wave:
Description: With a similar stance to the double wave, move one arm up as the other goes down, creating alternating waves in the ropes.
Uses: It works the arms, shoulders, and core, while also improving coordination.
3. Power Slam:
Description: Hold the ropes with both hands overhead and then slam them down with power onto the ground.
Uses: Engages the core, lats, triceps, and shoulders. It’s also a great way to release stress!
4. Side to Side Wave:
Description: Holding a rope in each hand, swing your arms from side to side, creating lateral waves in the ropes.
uses: Targets the obliques, shoulders, and arms.
5. Rope Jumping Jacks:
Description: As you perform a jumping jack motion with your legs, create alternating waves with the ropes.
Uses: Provides a full body workout and elevates the heart rate.
6. Rope Russian Twist:
Description: Sit on the ground with your feet lifted. Hold both ropes to one side and use your core to twist and slam them on alternating sides.
Uses: Targets the obliques and abdominals.
7. Rope Pulls:
Description: With the ropes anchored a distance away, pull them towards you hand over hand, as if you were pulling in a heavy object.
Uses: Strengthens the back, biceps, and shoulders.
Benefits of Battling Ropes:
1. Full Body Engagement: Most battling rope exercises engage multiple muscle groups simultaneously, leading to comprehensive strength and endurance improvements.
2. Cardiovascular Workout: Due to the intensity, battling rope exercises can significantly raise your heart rate, making them an effective cardiovascular exercise.
3. Functional Strength: The movements involved mimic real world activities, improving functional strength and movement.
4. Flexibility: Different exercises target various muscle groups, allowing for a varied and balanced workout.
5. Low Impact: Despite their intensity, most battle rope exercises are low impact, reducing the risk of joint injuries.
6. Burns Calories: The combination of strength and cardio makes for a highly effective calorie burning workout.
7. Core Development: Almost all exercises with battling ropes engage the core, leading to improved posture, stability, and overall strength.
When incorporating battling ropes into your workout, always ensure that the anchor point is secure. It’s also advisable to maintain a stable stance with a slight bend in the knees to protect the back. If you’re new to battling ropes, start with short intervals and progressively increase the duration as your strength and endurance improve.
Calisthenics equipment: Balance Board
A balance board is a piece of fitness equipment used for improving balance, stability, and functional strength. It generally consists of a flat surface with a curved or unstable base, which requires the user to engage core muscles to remain upright. Here are some exercises you can perform with a balance board and their associated benefits:
Balance Board Exercises:
1. Basic Balancing:
Description: Stand on the board with feet hip width apart, trying to keep the board stable without letting its edges touch the ground.
Uses: Challenges and improves overall balance and engages the core.
2. Squats:
Description: While balancing on the board, lower yourself into a squat position, then return to standing.
Uses: Strengthens the quads, hamstrings, glutes, and core while improving balance.
3. Push Ups:
Description: Place your hands on the edges of the board and perform push ups, maintaining balance.
20
4. Plank:
Description: With your hands on the board, hold a plank position while keeping the board stable.
Uses: Strengthens the core, shoulders, and back.
5. Single Leg Balance:
Description: Stand on one leg, trying to keep the board level.
Uses: Challenges balance, engages the stabilizer muscles, and strengthens the legs.
6. Tilts:
Description: While standing on the board, tilt it forward and backward or side to side, controlling the motion.
Uses: Engages the core and lower body, improving proprioception.
7. Lunges:
Description: Place one foot in the center of the board while stepping the other foot back into a lunge.
Uses: Strengthens the legs and core while improving balance.
Benefits of Using a Balance Board:
1. Improved Balance and Stability: Regular use of a balance board will enhance your ability to maintain stability on uneven surfaces, reducing the risk of falls.
2. Core Strengthening: Balancing requires constant engagement of the core muscles, leading to a stronger midsection.
3. Proprioceptive Training: Enhances the body’s ability to sense its position in space, which is beneficial for athletes and rehabilitation.
4. Functional Fitness: Many balance board exercises mimic real world movements, improving day to day functional strength.
5. Rehabilitation: Balance boards are often used in physical therapy settings to help patients regain strength, mobility, and balance after injuries.
6. Joint Stability: Regular use can improve the stability of ankle, knee, and hip joints.
7. Low Impact: Most balance board exercises are gentle on the joints, making it suitable for those with joint concerns.
When starting with a balance board, safety is paramount. It’s advisable to have a sturdy object or wall nearby to hold onto if you lose balance. Over time, as your stability improves, you can progress to more advanced exercises and longer durations.
External Links
Learn more about calisthenics on Wikipedia.
Thank you so much for taking the time to read my blog. I truly appreciate the effort and interest you’ve shown in engaging with my content. It means a lot to me, and I hope you found it insightful and valuable. I always strive to share my thoughts, experiences, and knowledge in the best way possible, and it’s heartening to know there are readers like you who connect with it. Your continued support inspires me to keep writing and sharing. Once again, thank you for being a part of my blogging journey.
If you enjoyed this post and are curious about exploring some Native American food recipes, please click on the link provided. Your journey into rich culinary traditions await.