Unlock the secrets to fuss-free, bountiful harvests right in your living room! Discover ‘The Lazy Person’s Guide to Indoor Herb Gardening: 15 Easy Tips.’ No green thumb is required! Zero time-wasting steps! From set-up to harvest, make gardening a walk in the park!
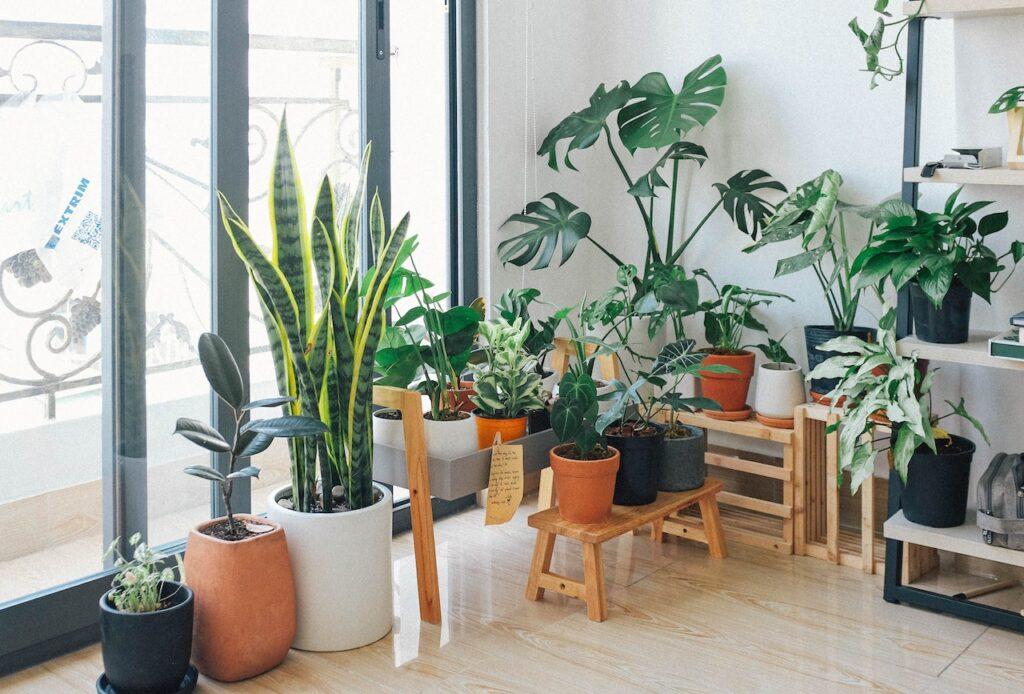
Table of Contents
Introduction to indoor herb gardening tips
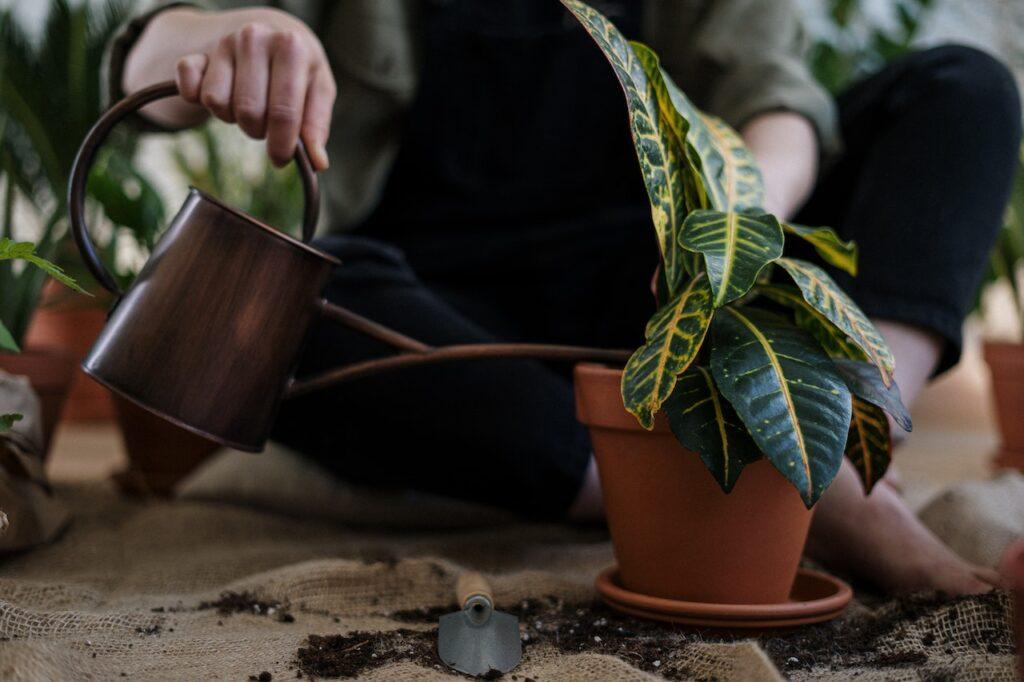
Indoor herb gardening is a great alternative to getting them at the store. They smell good and bring life to your home. They are also less expensive and more recent. If you know how to do it right, growing herbs indoors can be fun and easy for both newbies and experts. This blog post tells you how to take the best care of your home plant garden. Since a long time ago, gardening has been fun and gratifying. It helps us feel more connected to nature and improves the way our surroundings look. But what if you don’t have a big yard because you live in an apartment? Don’t freak out! Herbs grown indoors save the day. They give your home some growth and give you fresh herbs you can use to spice up your food. Today, we’ll talk about 15 useful tips for growing herbs indoors.
Here are 15 Easy tips for Indoor herb gardening:
- Start with the Easiest Herbs: A Beginner’s Guide to Indoor Herb Gardening
- Use High-Quality Seeds or Seedlings: The Foundation of Successful Indoor Herb Gardening
- Maintaining Optimal Temperature: Creating the Ideal Climate for Indoor Herb gardening
- Use the Right Soil: A Crucial Component for Indoor Herb Gardening Success
- Proper Drainage is Essential: Ensuring a Healthy Root System for Your Indoor Herb Gardening
- Water Wisely: Mastering the Art of Irrigation for Your Indoor Herb Garden
- Fertilize Sparingly: A Balanced Approach to Nutrient Supply for Your Indoor Herb Garden
- Prune Regularly: The Key to a Healthy, Productive Indoor Herb Garden
- Rotate Your Pots: Ensuring Balanced Growth for Your Indoor Herb Garden
- Repot When Necessary: Keeping Your Indoor Herb Garden Thriving
- Keep an Eye Out for Pests: Protecting Your Indoor Herb Garden
- Use the Right Containers: Optimizing Your Indoor Herb Garden
- Consider Your Humidity: Balancing Moisture for a Healthy Indoor Herb Garden
- Consider Your Humidity: Balancing Moisture for a Healthy Indoor Herb Garden
- Be Patient: The Virtue of Time in Cultivating an Indoor Herb Garden
Now that we’ve talked about the basics, let’s get into the 15 easy tips for indoor herb gardening. We’ll go over each tip step by step so that your herb garden grows well. We cover everything you need to know to make a successful indoor oasis, from choosing the right soil and pots to learning how to water and light them. Stay tuned for a full guide that will make it easy to grow herbs.
1. Start with the Easiest Herbs: A Beginner’s Guide to Indoor Herb Gardening
Getting started with indoor herb growing can be hard, especially if you have never done it before. But if you start with the easiest herbs to grow, you can set yourself up for success and gain the confidence to grow other plants in the future. Here’s a guide to getting started with easy-to-grow herbs for indoor plant gardening.

The Easiest Herbs to Start With
- Basil: This popular herb loves warm conditions and is generally quite easy to grow indoors as long as it gets plenty of light.
- Mint: Mint is nearly indestructible and can thrive even if you forget to water it occasionally. But be cautious, as it can be invasive.
- Chives: Requiring minimal care and space, chives are an ideal choice for beginners. They do well in partial light and are forgiving if you forget to water them now and then.
- Parsley: Another resilient herb, parsley can adapt to both full sun and partial shade, and it can tolerate a bit of neglect.
- Oregano: A hardy herb that thrives in various conditions, is perfect for those who may not have a perfect track record with plants.
Basic Care Tips for Easy Herbs
- Light: Most herbs require at least 6-8 hours of indirect sunlight per day. If you don’t have enough natural light, supplemental LED grow lights can help.
- Soil: A well-draining soil mix is crucial. You can opt for a general-purpose potting soil and mix in some perlite for added drainage.
- Watering: Overwatering is a common mistake. Water your herbs when the top inch of soil feels dry to the touch.
- Fertilizing: A balanced, water-soluble fertilizer can be used once a month. However, herbs like basil and mint often do well even without additional fertilization.
Harvesting
- Once your herbs have enough foliage to sustain growth (usually when they are about 6 inches tall), you can begin to harvest. Use clean, sharp scissors to make your cuts, and never take more than one-third of the plant at one time.
Challenges and Solutions
- Pests: Watch out for common pests like aphids and spider mites. Insecticidal soap or neem oil can help control these nuisances.
- Legginess: If your herbs are stretching out and seem to have long, thin stems, they are likely not getting enough light. Re-position them or add supplemental lighting.
Benefits of Starting Easy
- Boosts Confidence: Successfully growing easy herbs can provide a much-needed confidence boost, setting the stage for you to explore more challenging plants.
- Quick Harvest: Easy-to-grow herbs usually grow quickly, offering a faster harvest that can be very satisfying for a beginner.
- Versatility: These beginner-friendly herbs are not only easy to grow but are also versatile in the kitchen, making your culinary endeavors equally rewarding.
The best way to have a fun and rewarding gardening experience is to start your home herb garden with herbs that are easy to grow. As you get better at caring for plants and gain more confidence, you can start adding harder herbs to your home garden. Starting small can lead to a lasting hobby, whether you’re interested in the food, the possible health benefits, or just the fun of watching something grow.
2. Use High-Quality Seeds or Seedlings: The Foundation of a Successful Indoor Herb Garden
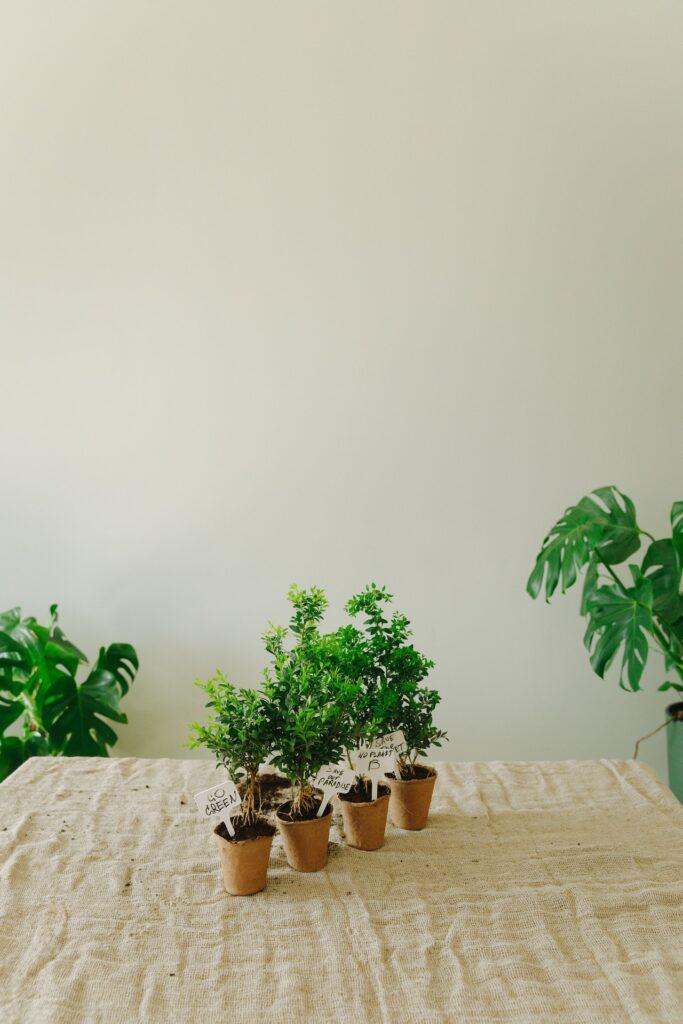
When you start growing herbs indoors, the quality of your starting materials can make a big difference in how well they grow. Using good seeds or seedlings as a starting point can help you grow strong plants, get a healthy crop, and have a fun time gardening. Here’s a guide to helping you understand how important quality is and how to get off on the right foot.
The Importance of High-Quality Seeds or Seedlings
- Germination Rates: High-quality seeds often have better germination rates, ensuring that you get more plants for the number of seeds you sow.
- Disease Resistance: Quality seeds or seedlings are usually more resistant to diseases, reducing the need for chemical treatments and increasing the chances of a healthy harvest.
- True to Type: With high-quality seeds or seedlings, the plant you grow will more likely be true to the type described, whether in terms of flavor, appearance, or growth habits.
- Longevity: Quality seeds can have a longer shelf life, giving you more flexibility if you decide to stagger your plantings.
Where to Buy High-Quality Seeds or Seedlings
- Reputable Retailers: Whether online or in-store, always buy from a reputable retailer who is known for quality.
- Seed Exchanges and Libraries: These are good options for finding quality seeds, though it’s best if the exchange or library is well-curated.
- Certified Organic: If you prefer to go the organic route, look for seeds or seedlings that are certified organic.
- Local Nurseries: Staff at local nurseries often have expert knowledge about what varieties do well in your area and may offer high-quality, locally adapted varieties.
Identifying Quality
- Packaging: Quality seeds often come in well-designed, informative packages that include details like the plant’s scientific name, date of packaging, and sometimes even the germination rate.
- Seed Appearance: The seeds should look clean, and there shouldn’t be any signs of mold or decay.
- Healthy Seedlings: If you’re buying seedlings, look for plants that are stout and green with no signs of disease or pests.
How to Store Seeds Properly
- Cool and Dry: Store your seeds in a cool, dry place to maximize their lifespan.
- Airtight Containers: Using airtight containers can help keep moisture and pests out.
- Labeling: Always label your seed packets with the date of purchase and any other pertinent information to help you identify them later.
Starting from Seed vs. Seedlings
- Starting from Seed: This method offers you the most variety but requires more time and care in the beginning stages.
- Starting from Seedlings: This offers a quicker start and is generally easier for beginners, but you may have fewer options in terms of varieties.
Takeaways
- Opt for quality over quantity. It’s better to have fewer healthy, robust plants than many weak or diseased ones.
- Good quality doesn’t always mean expensive. Sometimes it simply means sourcing your seeds or seedlings from reputable sources.
- Quality is a long-term investment. Quality seeds or seedlings often produce plants that yield more abundantly and are easier to care for, providing you with returns season after season.
Starting with high-quality seeds or seedlings is a critical step in establishing successful indoor herb gardens. By investing in quality, you can increase your chances of enjoying a bountiful and satisfying harvest.
3. Maintain Optimal Temperature: Creating the Ideal Climate for Indoor Herbs
Temperature is very important for plant growth and health. It affects everything from how fast seeds germinate to how strong the essential oils in herbs are. For indoor herb gardeners to grow a healthy, effective garden, they need to know how to maintain the right temperature conditions. This guide gives ideas and suggestions on how to control temperature well to get the best results.
Why Temperature Matters
- Germination: Seeds have a specific temperature range within which they will germinate. Too low or too high temperatures can reduce or even inhibit germination.
- Growth Rates: Optimal temperature can expedite metabolic processes, resulting in faster growth.
- Resilience: Plants kept at their ideal temperatures are generally more resistant to pests and diseases.
- Flavor and Aroma: Some herbs develop better flavors and aromas when grown at specific temperatures.
Understanding Temperature Needs
- Different herbs have different temperature requirements, but most tend to prefer:
- Daytime Temperatures: Generally, 65–75°F (18–24°C) is a comfortable range for many herbs.
- Nighttime Temperatures: A slight drop of 5–10 degrees is often beneficial but not mandatory.
Tools for Temperature Control
- Indoor Thermometer: Investing in a quality indoor thermometer will help you accurately monitor the temperature in your growing area.
- Programmable Thermostats: These can help maintain consistent temperatures by controlling heating and cooling systems automatically.
- Heating Mats: For germination and seedlings, heating mats can provide the warmth needed for optimal growth.
Tips for Managing Temperature
- Location: Place your herbs in a location that’s less susceptible to temperature fluctuations, like away from drafty windows or heating vents.
- Seasonal Adjustments: Be prepared to move your herbs or adjust temperature controls according to seasonal changes.
- Insulation: In colder months, consider insulating the growing area with materials like foam boards to retain heat.
- Ventilation: Make sure there is adequate air circulation to help regulate the temperature and reduce the risk of diseases like mold and mildew.
- Water Temperature: Always use room-temperature water for watering your herbs. Cold water can shock the plants and slow growth.
Observing Your Plants
- Signs of Stress: If leaves are drooping or turning yellow, it may be a sign that the temperature is too high or too low.
- Growth Monitoring: Slow growth or a lack of flowering may also be indicators that the temperature is not ideal.
- Adjust Accordingly: If you observe signs of temperature stress, make the necessary adjustments to your environmental controls.
Takeaways
- Optimal temperature is key to the health and productivity of your indoor herb garden.
- Tools like indoor thermometers and programmable thermostats can help you maintain the right conditions.
- Always observe your plants for signs of stress and adjust your temperature settings as needed.
By taking the time to learn about the temperature needs of your indoor veggies and putting plans in place to meet those needs, you can make your indoor garden much healthier and more productive. Whether you’re growing basil, mint, rosemary, or any other herb, the right temperature will help your plants grow well.
4. Use the Right Soil: A Crucial Component for Indoor Herb Garden Success
Your herbs get most of the nutrients, water, and air they need from the dirt they grow in. So, the type of soil you use can make a big difference in how well your home herb garden grows. It’s important to know what makes up soil, how different herbs have different needs, and how to take care of soil. Here’s how to make sure you put your indoor herbs in the best soil for their best growth and health.

Why Soil Matters
- Nutrient Supply: Soil is the primary source of essential nutrients like nitrogen, phosphorus, and potassium that herbs need for growth.
- Water Retention and Drainage: The right soil will retain enough water to keep the roots moist but will also drain well enough to prevent waterlogged conditions.
- Aeration: Good soil allows for the adequate movement of air, which is vital for root respiration.
- pH Levels: The acidity or alkalinity of the soil can affect nutrient availability and, therefore, plant health.
Components of Good Soil
- Organic Matter: Ingredients like compost or well-rotted manure provide nutrients and improve soil structure.
- Sand Provides drainage and aeration.
- Silt and clay Retain water and nutrients.
- Perlite or Vermiculite: These are sometimes added to improve aeration and drainage.
Types of Soil for Herbs
- Different herbs have varying soil requirements, but most herbs prefer:
- Well-Drained Soil: Almost all herbs prefer soil that drains well. A mix that includes perlite, sand, and organic matter is often ideal.
- Slightly Acidic to Neutral pH: Most herbs thrive in a slightly acidic to neutral soil with a pH of 6-7.
- Nutrient-Rich: Incorporating compost or a slow-release fertilizer can provide the nutrients herbs need to thrive.
Soil Care Tips
- Regular Testing: Periodic soil testing can help you understand nutrient levels and pH, allowing you to make necessary amendments.
- Fertilization: Most herbs don’t require heavy fertilization. Over-fertilizing can lead to excessive growth at the expense of flavor and aroma.
- Mulching: A thin layer of organic mulch can help retain moisture and regulate temperature.
- Repotting: As herbs grow, they may need to be moved to larger pots with fresh soil to ensure an adequate nutrient supply and space for root growth.
Signs of Soil Issues
- Yellow leaves May indicate nutrient deficiencies or problems with water drainage.
- Stunted growth Can result from compacted, poorly aerated soil or nutrient deficiencies.
- Root rot is usually a sign of overwatering, which is often due to poor drainage.
Takeaways
- Using the right soil is not just about planting your herbs and forgetting about it; it’s about ongoing soil management.
- Whether you’re mixing your own soil or buying a pre-made mix, look for ingredients that will meet the specific needs of the herbs you’re growing.
- Continual observation and occasional soil testing will help you spot issues before they become major problems, allowing for timely intervention and healthier plants.
If you pay close attention to the type and state of the soil in your indoor herb garden, you can have a big effect on your plants’ health, growth, and yield. The right soil is the key to a healthy yard and gives your herbs the best chance of doing well.
5. Proper Drainage is Essential: Ensuring a Healthy Root System for Your Indoor Herbs
When it comes to growing herbs indoors, good drainage is a must. It can have a big effect on how healthy and productive your plants are. Root rot, nutrient imbalances, and plants that are more susceptible to pest and disease attack are just a few of the issues that can arise from having too much water in the soil. Here’s a detailed guide on why drainage is important and how to make sure your home herb garden has good drainage.
Why Drainage Matters
- Prevents Root Rot: Waterlogged soil deprives roots of oxygen, leading to decay and root rot.
- Nutrient Uptake: Proper drainage ensures that roots can efficiently absorb necessary nutrients without being overwhelmed by excess water.
- Disease Resistance: Well-drained soil is less likely to harbor pathogens and pests that thrive in stagnant, wet conditions.
- Encourages Healthy Growth: Proper drainage allows the root system to breathe and grow, thus promoting overall plant health.
Components for Good Drainage
- Well-Drained Soil: The soil mix should contain elements like sand and perlite that promote good drainage.
- Drainage Holes: Always use pots with adequate drainage holes at the bottom.
- Saucers and Trays: Place a saucer or tray beneath the pot to catch excess water and prevent spills.
- Elevated Stands: Using pot stands or risers can further improve drainage and aeration.
Practical Tips for Ensuring Proper Drainage
- Test Drainage: Before planting, water the soil in the pot to see how quickly it drains. If the water pools or drains too slowly, you’ll need to adjust your soil mix or pot choice.
- Avoid Overwatering: Stick to a watering schedule that allows the soil to dry out slightly between waterings. Overwatering can exacerbate drainage issues.
- Use Gravel or Stones: Placing a layer of gravel or small stones at the bottom of the pot can help improve drainage, but this is not a substitute for a pot with drainage holes.
- Check for obstructions: On occasion, make sure that roots or soil are not blocking the drainage holes.
- Repotting: If you notice consistent drainage problems, it might be time to repot the plant in better-draining soil or a more suitable container.
Monitoring Your Plants for Drainage Issues
- Visual Inspection: Water should not pool on the soil surface for an extended period after watering.
- Physical Checks: Gently touch the soil; it should feel moist but not soggy.
- Plant Symptoms: Yellow or dropping leaves, stunted growth, and a musty smell are signs of poor drainage and potential root rot.
Takeaways
- Proper drainage is crucial for maintaining the health and well-being of your indoor herbs.
- Investing in well-drained soil and pots with adequate drainage holes can save you a lot of trouble down the line.
- Always monitor your plants for signs of drainage issues, and take corrective measures as soon as possible.
Drainage is important for the long-term success of your indoor herb gardening, so you need to know how to do it right and put it into practice. If you pay close attention to how your plants drain, you can avoid many of the problems that often happen to indoor farmers and have a healthy, thriving herb garden.
6. Water Wisely: Mastering the Art of Irrigation for Your Indoor Herb Garden
It may seem like watering your home herb garden is the easiest thing to do, but this is where many gardeners go wrong. If your herbs get too much or too little water, it can hurt their health, growth, and output. This guide aims to take the mystery out of watering by giving you tips and tricks to make sure your herbs get the water they need without getting too wet.
Why Watering Matters
- Nutrient Absorption: Water is the medium through which nutrients are absorbed from the soil into the plant.
- Cell Structure: Water helps maintain the structure of plant cells, keeping the herb upright and robust.
- Germination: Seeds need moisture to germinate and initiate root development.
- Metabolic Processes: Water is essential for various biochemical processes within the plant, including photosynthesis and respiration.
- Water Requirements of Common Herbs
- Different herbs have varying water needs, but most indoor herbs prefer:
- Consistent Moisture: Herbs like basil, cilantro, and parsley prefer consistently moist but not waterlogged soil.
- Moderate Watering: Herbs like rosemary, thyme, and oregano prefer slightly drier conditions and should be watered less frequently.
Tools for Efficient Watering
- A watering can with a Long spout Helps deliver water directly to the soil, avoiding the leaves.
- Moisture Meter: Useful for checking soil moisture levels before watering.
- Misting Spray: Good for herbs that prefer higher humidity, but should be used sparingly to prevent disease.
Best Practices for Watering
- Check Soil Moisture: Before watering, stick your finger into the soil up to an inch. If it feels dry, it’s time to water it.
- Watering Schedule: Establish a consistent watering schedule but adjust it based on the needs of individual plants and environmental conditions like temperature and humidity.
- Watering Technique: Water the soil, not the leaves. Wet leaves can lead to fungal diseases.
- Morning is Best: Aim to water your herbs in the morning so that any excess water can evaporate throughout the day, reducing the risk of disease.
- Use Room-Temperature Water: Cold water can shock the plants and affect metabolic processes.
Signs You’re Not Watering Wisely
- Yellow leaves are often a sign of overwatering, leading to root rot.
- Wilted or Drooping leaves May indicate both overwatering and underwatering. Check the soil to diagnose.
- Stunted Growth: Inconsistent or inadequate watering can lead to slow or stunted growth.
Takeaways
- Proper watering is essential for successful herb gardening, but it needs to be customized to the specific needs of each herb and the growing conditions.
- Tools like moisture meters can take the guesswork out of determining when to water, while quality watering can offer precision in how you water.
- Monitoring your plants for signs of stress can help you adjust your watering routine as necessary, ensuring a healthier, more productive garden.
By knowing how important it is to water plants the right way, you can avoid making one of the most common plant care mistakes. If you pay attention to how much water each herb needs and change your methods properly, you’ll be able to grow a healthy indoor herb garden.
7. Fertilize Sparingly: A Balanced Approach to Nutrient Supply for Your Indoor Herb Garden
Adding fertilizer to your home herb garden can be both good and bad. Even though it’s important to add nutrients to your soil that might not be there naturally, too much fertilizer can cause problems like nutrient ratios, poor quality herbs, and even plant death. This guide is meant to help you figure out how to fertilize indoor flowers. It suggests that ‘less is more’ for long-term success.
Why Fertilizing Matters
- Nutrient Supply: Many essential nutrients are required for plant growth, including nitrogen, phosphorus, potassium, and trace minerals.
- Vital Functions: Nutrients support various physiological functions in the plant, including growth, flowering, and the ability to fight off diseases.
- Soil Health: Over time, plants deplete the nutrients in the soil. Fertilizing can help replenish these crucial elements.
Types of Fertilizers
- Organic Fertilizers: Examples include fish emulsion, bone meal, and compost. They are slower to release and less likely to cause nutrient imbalances.
- Chemical Fertilizers: These are fast-acting but can easily lead to over-fertilization if not used cautiously.
- Slow-Release Fertilizers: These pellets break down slowly, providing a long-term nutrient supply.
- Liquid Fertilizers: These are easy to apply but require more frequent applications.
Best Practices for Fertilizing
- Read Instructions: Always follow the manufacturer’s instructions for application rates and frequencies.
- Start Small: It’s better to underfertilize than overfertilize. You can always add more later.
- Observe Your Plants: Look for signs of nutrient deficiencies (e.g., yellow or discolored leaves, stunted growth) to gauge when fertilizing is needed.
- Test Your Soil: For a more scientific approach, test your soil to determine what nutrients it may be lacking.
- Seasonal Needs: Some herbs may need more nutrients during their active growing season and less during the dormant periods.
Signs You’re Over-Fertilizing
- Leaf Burn: Excess nutrients can cause the tips of leaves to turn brown and die.
- Poor Flavor and Aroma: Over-fertilizing, particularly with nitrogen-rich fertilizers, can lead to lush growth but poor quality of herbs.
- Root Damage: Excessive fertilization can lead to a toxic buildup of nutrients, damaging the roots and potentially killing the plant.
Takeaways
- Fertilization is a critical aspect of plant care, but more is not always better. The key is to find the right balance that meets the specific needs of your herbs without going overboard.
- Consider using organic fertilizers for a slow, steady nutrient supply that minimizes the risk of over-fertilization.
- Regularly observe your plants and soil to identify what nutrients may be needed, and adjust your fertilization practices accordingly.
By being careful about how much fertilizer you use, you can avoid many of the problems that come up when farmers are too eager. The key is to give your herbs a balanced amount of nutrients that meet their needs. This will help them grow well without the risks that come with over-fertilizing. This will keep your home herb garden alive, healthy, and full of herbs for a long time.
8. Prune Regularly: The Key to a Healthy, Productive Indoor Herb Garden
Pruning may seem strange to new farmers. After all, why would you want to cut off parts of a plant you’re trying to grow? But trimming your indoor herbs regularly is an important task that can improve their health, shape, and yield. This guide will explain why, when, and how to prune your home herb garden so that you get the most out of it.
Why Pruning Matters
- Enhanced Growth: Pruning encourages new growth by allowing light to penetrate the lower parts of the plant.
- Shape and Structure: Regular pruning helps maintain the shape and structural integrity of your plants, making them more aesthetically pleasing.
- Increased Yield: Pruning can stimulate the plant to produce more foliage, flowers, or fruits depending on the type of herb.
- Disease Management: Removing dead or diseased parts of the plant can help prevent the spread of infections.
When to Prune
- Active Growing Season: Most herbs are best pruned during their active growth season. Check the specific requirements for each herb you’re growing.
- Before Flowering: For herbs grown for their leaves (like basil or parsley), pruning before the plant flowers will often yield better-tasting foliage.
- After Harvest: For herbs grown for their flowers or seeds (like lavender or dill), pruning immediately after harvest can stimulate another round of blooming.
Tools for Pruning
- Sharp Scissors or Pruners: Make sure they are clean to avoid transferring diseases.
- Gloves: Some herbs have oils or thorns that can irritate the skin, making gloves a useful precaution.
How to Prune
- Selective Cutting: Always prune above a leaf node (the point where a leaf joins a stem). This is where new stems will grow.
- Moderation: Don’t remove more than one-third of the plant at a time. Over-pruning can stress the plant.
- Target Areas: Focus on removing dead or yellow leaves and thin or weak stems. Also, consider cutting back overly long stems to encourage bushier growth.
- Consistency: Make it a habit to inspect and, if necessary, prune your plants regularly. Some herbs may require weekly attention, while others might need monthly care.
Signs You Need to Prune
- Overgrowth: The plant looks too large for its pot or is overshadowing other plants.
- Sparse Areas: Lack of foliage or poor growth in some parts of the plant indicates a need for pruning to redistribute growth energy.
- Disease or Pests: Visible signs of disease or pest activity are a clear signal that you need to remove affected parts immediately.
Takeaways
- Pruning is not just for large trees and shrubs; it’s a vital practice for keeping your indoor herb garden healthy and productive.
- Use clean, sharp tools and follow herb-specific guidelines to make the most of your pruning efforts.
- Regular pruning can result in bushier plants, higher yields, and a more aesthetically pleasing indoor garden.
By knowing how important pruning is and making it a regular part of how you care for your indoor herb garden, you can greatly improve its health and yield. It’s an important step that will pay off with stronger, more productive plants that will bring you joy and taste for many seasons to come.
9. Rotate Your Pots: Ensuring Balanced Growth for Your Indoor Herb Garden
Have you ever noticed that your home plants seem to “lean” toward the light source, causing them to grow unevenly? This is called “phototropism,” and it means that plants grow toward the light so that photosynthesis works best. Even though this is a normal way for plants to stay alive, it can make a herb garden look uneven and possibly unhealthy. How do I fix it? Rotate your pots often. This easy, but often forgotten, step can help your indoor flowers grow more evenly and strongly.
Why Rotating Matters
- Balanced Growth: Rotating your pots helps distribute light evenly, ensuring that all parts of the plant grow at the same rate.
- Optimal Photosynthesis: Even exposure to light ensures that the plant can produce food efficiently through photosynthesis.
- Aesthetic Appeal: Balanced plants are more attractive and fit better in decorative arrangements, making your indoor garden pleasing to the eye.
- Healthier Plants: When all sides of a plant receive equal light, the risk of disease or pest infestation is often reduced because there are fewer “hidden” or hard-to-reach areas.
Best Times to Rotate
- Weekly Checks: Ideally, you should rotate your pots every week to ensure even growth.
- After Watering: Some gardeners find it convenient to rotate pots after watering as they are already tending to their plants.
- Seasonal Changes: As the angle of the sun changes throughout the year, monitor your plants for uneven growth and rotate as needed.
Tools and Techniques
- Mark Your Pots: Place a small mark or sticker on the pot as a reminder of its original orientation, making it easier to ensure you rotate it adequately.
- Quarter-Turns: A simple quarter-turn every week usually suffices for most indoor herbs.
- Visual Checks: Always observe your plants when rotating them. Look for signs of disease, pests, or nutrient deficiencies and address them as needed.
- Alternate Heights: If your herbs are on a window sill or stand, consider swapping their positions occasionally, so smaller plants aren’t perpetually overshadowed by taller ones.
Common Mistakes to Avoid
- Over-Rotating: While it’s good to rotate the pots, doing it too often can stress the plants, causing them to expend extra energy to adjust.
- Ignoring Signs of Stress: If you see leaves dropping or yellowing, consider whether you may be rotating too frequently or if other care practices need to be adjusted.
Takeaways
- Rotating your pots is a simple but effective way to promote even growth, improve photosynthesis, and reduce the risk of disease and pest infestation.
- Incorporating this practice into your regular care schedule, perhaps combined with other tasks like watering, can make it an easy habit to maintain.
- Observing your plants closely when rotating can offer insights into their health, alerting you to any issues that may need attention.
Rotating the pots is a small step that will help you care for your home herbs in a big way. This simple step makes sure that each plant gets enough light from all directions, which promotes balanced, healthy growth and a more beautiful look. You can improve the health and beauty of your home herb garden with just a few turns here and there.
10. Repot When Necessary: Keeping Your Indoor Herb Garden Thriving
Even though it’s fun to see our homegrown herbs grow, sometimes they get too big for their space and can’t reach their full potential. When this happens, it’s time to repot the plant. Even though it can be scary, especially for new growers, repotting is an important part of keeping an indoor herb garden healthy and growing. This guide will tell you why, when, and how to move your indoor flowers to a new pot.
Why Repotting Matters
- Room to Grow: Over time, plants can outgrow their pots, leading to cramped roots and stunted growth.
- Nutrient Supply: Old soil can become depleted of essential nutrients. Fresh soil can reinvigorate a plant.
- Health Check: Repotting offers an opportunity to examine the root system for signs of rot or disease.
- Improved Drainage: Fresh soil and a new pot can improve drainage, reducing the risks of overwatering and root rot.
When to Repot
- Visible Roots: If you see roots emerging from the drainage holes or growing above the soil surface, it’s time to repot.
- Stunted Growth: A plant that seems to have stopped growing despite proper care may be root-bound and in need of repotting.
- Watering Issues: If water runs straight through the pot or the soil stays soggy for an extended period, these are signs that repotting might be beneficial.
- Seasonal Timing: Late winter or early spring, just before the growing season, is often the best time to repot.
Tools and Supplies
- New Pot: Choose a container that is at least 2 inches larger in diameter than the current pot.
- Quality Soil: Opt for a high-quality potting mix suited for herbs or general indoor plants.
- Gloves: Some herbs have sap or oils that can irritate the skin.
- Trowel and Pruners: For loosening soil and trimming roots, if necessary.
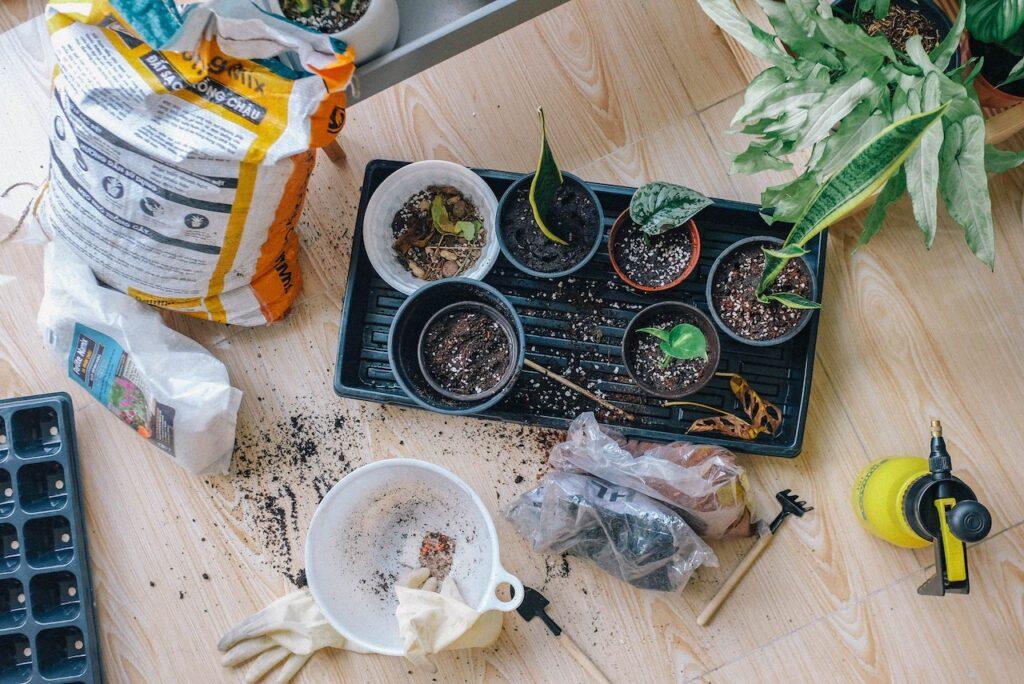
How to Repot
- Preparation: Water your plant a day before repotting to make the process easier on the roots.
- Removal: Gently remove the plant from its current pot, taking care not to damage the root ball.
- Inspect and Prune: Look for dead or rotting roots and trim them away.
- New Pot, New Soil: Add some fresh soil to the bottom of the new pot and place your plant in, filling in around the sides with more soil.
- Watering: Water the plant lightly to help settle the soil.
- Rest: Place the newly potted plant in a shady area for a few days to help it recover from the stress of repotting.
Common Mistakes to Avoid
- Overpotting: Don’t choose a pot that is significantly larger than the root ball; this can lead to overwatering.
- Ignoring Root Health: Failing to inspect and trim the roots can perpetuate existing problems.
- Immediate Sun Exposure: Placing the plant in direct sun immediately after repotting can stress the plant.
Takeaways
- Repotting is an essential practice for keeping your indoor herb garden healthy and vibrant. It’s a chance to refresh the soil, examine root health, and give your plants the space they need to grow.
- Choose quality supplies, be gentle with your plants during the transition, and pay attention to timing for the best results.
- By recognizing the signs that it’s time to repot and following best practices, you can ensure that your indoor herbs continue to thrive for years to come.
Repotting may seem like a chore, but it’s an important part of long-term plant care that can lead to healthier, happier herbs. You can make the change as easy as possible for your green friends with a little work and attention to detail.
11. Keep an Eye Out for Pests: Protecting Your Indoor Herb Garden
Although indoor herb gardens are typically less prone to pests than their outdoor counterparts, they are not completely pest-proof. An infestation could be a threat to the health of your plants, necessitating immediate action. This tutorial will explain why it’s crucial to keep an eye out for pests, how to spot typical offenders, and what you can do to safeguard your indoor herbs.
Why Monitoring for Pests Matters
- Early Detection: The sooner you identify a pest problem, the easier it will be to manage and eradicate.
- Plant Health: Pests can cause various diseases and may hinder plant growth, reducing your herb yield.
- Prevention: Regular monitoring can help you prevent infestations, saving you time and effort in the long run.
- Indoor Ecology: Pests can spread to other houseplants, creating a broader problem that’s harder to control.
Common Indoor Pests
- Spider mites are tiny arachnids that can cause leaves to turn yellow and stippled.
- Aphids: Small, green, or black insects that suck plant sap, leading to curled or distorted leaves.
- Whiteflies are small white insects that can cause yellowing and reduced vitality.
- Fungus Gnats: These pests primarily affect the soil and can hinder root development.
- Mealybugs: are cotton-like insects that can cause stunted growth and leaf drop.
Signs and Symptoms
- Discoloration: Yellow, brown, or spotted leaves can be a sign of pest activity.
- Sticky Residue: Some pests excrete a substance known as honeydew, which can be sticky to the touch.
- Webbing: Fine webs on leaves or between stems often indicate spider mites.
- Visible Insects: In severe cases, you may see the pests themselves on the leaves, stems, or soil.
Preventative and Reactive Measures
- Isolate New Plants: Keep any new additions to your garden isolated for a week or two to ensure they’re pest-free.
- Regular Inspection: Make it a habit to inspect your plants during watering.
- Organic Pesticides: Neem oil, insecticidal soap, and horticultural oils are safer alternatives to chemical pesticides.
- Physical Removal: For larger pests like mealybugs, you can remove them using tweezers or a cotton swab dipped in alcohol.
- Environmental Control: Adjusting humidity and improving ventilation can make conditions less favorable for certain pests.
Common Mistakes to Avoid
- Overwatering: Excessive moisture can attract pests like fungus gnats.
- Ignoring Symptoms: Early signs of infestation are easier to manage than a full-blown problem.
- Overuse of Pesticides: Excessive use of chemical pesticides can harm your plants and create pesticide-resistant pests.
Takeaways
- Vigilance is the first line of defense against pests in your indoor herb garden. Regularly inspect your plants and take immediate action if you notice any signs of infestation.
- Utilize a combination of preventative measures and targeted treatments to manage and eradicate pests effectively.
- Monitoring for pests is not a one-time activity but a regular part of maintaining a healthy indoor herb garden.
You can make sure that your indoor herb garden remains a healthy and productive setting by keeping a watchful eye out for pests. For controlling these unwelcome visitors, early detection and prompt management are essential. You can maintain healthy, pest-free indoor herb gardens by using the proper techniques.
12. Use the Right Containers: Optimizing Your Indoor Herb Gardening
When creating an indoor herb garden, choose the appropriate container is a frequently skipped but essential step. The type, size, and material of the container can have a significant impact on your herbs’ productivity and health. This article will explore why choosing a container is important, what options are available, and how to choose the right one for your garden.
Why Container Choice Matters
- Root Health: The container’s size and shape affect how much room roots have to grow, which in turn affects plant health.
- Drainage: Proper drainage is essential for preventing root rot and other water-related issues.
- Material Considerations: The material of the container can affect soil pH and moisture retention.
- Aesthetic Appeal: Containers contribute to the overall look of your indoor garden, so it’s worthwhile to choose ones that you find visually pleasing.
Types of Containers
- Plastic pots are lightweight and inexpensive but may deteriorate over time.
- Ceramic or Clay pots are good for moisture retention but can be heavy and more fragile.
- Wooden Boxes: A rustic option that’s good for larger herb arrangements but may rot over time if not properly treated.
- Metal Containers: Stylish but can rust, and may not be suitable for all types of herbs.
- Hanging Baskets: Excellent for herbs that like to spread or cascade, such as mint or trailing rosemary.
- Self-Watering Planters: Convenient for those who may forget to water but can be more expensive.
Factors to Consider
- Size: Choose a container that allows ample room for root growth. A pot that is too small can lead to root-bound plants.
- Drainage Holes: Make sure the container has proper drainage to prevent water-logging.
- Depth: Herbs like parsley and chives prefer deeper pots, while thyme and oregano are fine in shallower containers.
- Material: Consider how the material may affect soil pH and water retention. For example, clay pots are more alkaline and may affect soil pH over time.
- Aesthetics: Make sure the container fits with the overall look and feel of your indoor garden or living space.
Tips for Success
- Repurpose with Care: While it’s tempting to use any available container, make sure it’s clean and suitable for growing food if you plan to consume the herbs.
- Good Drainage: If your chosen container doesn’t have drainage holes, you can add a layer of pebbles at the bottom to help with drainage.
- Location Matters: Make sure the container is suitable for where you plan to place it. Larger, heavier pots may not be ideal for hanging or placing on delicate surfaces.
Common Mistakes to Avoid
- Choosing Style Over Function: While aesthetics are important, the container must also meet the growing requirements of your herbs.
- Ignoring Drainage: Failure to ensure proper drainage can quickly lead to root rot and other moisture-related problems.
- Mismatched Size: A container that is too large can hold excess moisture, while one that is too small can restrict growth.
Takeaways
- The right container is essential for the health and productivity of your indoor herbs. Consider factors like size, drainage, and material when making your choice.
- A well-chosen container can enhance the aesthetic appeal of your indoor garden while also meeting the specific growing requirements of your herbs.
- Whether you’re setting up a new indoor herb garden or looking to optimize an existing one, taking the time to choose the right containers can make a significant difference in your gardening success.
With a little bit of research and consideration, you can select containers that not only look great but also provide the ideal growing environment for your indoor herbs.
13. Consider Your Humidity: Balancing Moisture for a Healthy Indoor Herb Gardening
Despite being one of the most frequently disregarded factors of indoor gardening, humidity is crucial to plant health. The relative humidity in the area has a significant impact on the rate at which plants lose water through a process known as transpiration. In this book, you will learn the significance of humidity, how it might impact your indoor herbs, and how to effectively regulate it for a flourishing herb garden.
Why Humidity Matters
- Transpiration: This is the process by which water is lost from plants. The humidity level affects how quickly this water loss occurs.
- Nutrient Uptake: Proper humidity helps in efficient nutrient uptake, as it balances water pressure inside and outside the plant cells.
- Pest Resistance: Some pests are more likely to infest plants that are stressed due to inappropriate humidity levels.
- Leaf Health: Too low or high humidity can cause leaves to dry out or become moldy, respectively.
What Affects Indoor Humidity?
- Climate: Your local weather conditions can influence indoor humidity, especially if you often keep windows open.
- Season: Winter heating and summer air conditioning can drastically alter indoor humidity levels.
- Household Activities: Cooking, showering, and even breathing can influence indoor humidity.
How to Measure Humidity
- Hygrometer: This device can accurately measure the humidity level in your home. They are relatively inexpensive and easy to find.
- Observation: Signs like condensation on windows, dry skin or throat, and how quickly soil dries out can give you clues about humidity.
Strategies to Control Humidity
- Humidifiers: These devices can add moisture to the air, which is useful during the dry winter months.
- Dehumidifiers: Useful in humid climates, these can help prevent mold and mildew.
- Water Trays: Placing a tray filled with water and pebbles under your herb pots can add localized humidity.
- Misting: A light mist can add moisture to leaves, but be cautious not to overdo it, as this can lead to mold.
- Ventilation: Proper air circulation can help distribute moisture evenly.
- Herb-Specific Humidity Needs
- Mint and Basil: These herbs generally prefer higher humidity levels.
- Rosemary and Thyme: These Mediterranean herbs are accustomed to lower humidity and well-drained soil.
Common Mistakes to Avoid
- Over-misting: This can lead to mold and fungal diseases.
- Ignoring Signs: Brown leaf tips may indicate too low humidity, while mold or soft growth may mean too high humidity.
- One-Size-Fits-All: Different herbs have different humidity needs. What works for one person may not work for another.
Takeaways
- Humidity is a critical yet often overlooked factor in the health of your indoor herb garden. From aiding in transpiration to influencing nutrient uptake, the right humidity level can make all the difference.
- You can control humidity through various means like humidifiers, dehumidifiers, and natural methods like water trays or misting. Remember, what’s right for one herb might not suit another, so adjust as needed.
- Always keep an eye out for signs of improper humidity levels, such as leaf discoloration or mold, and act accordingly to rectify the issue.
By taking time to understand and manage the humidity levels in your indoor herb garden, you can significantly improve the health and yield of your herbs.
14. Consider Your Humidity: Balancing Moisture for a Healthy Indoor Herb Gardening
Even though humidity is one of the most frequently disregarded factors of indoor gardening, it is essential to plant health. The amount of humidity in the air has a significant impact on how quickly plants transpire, which causes them to lose water. This article will explain the significance of humidity, how it can impact your indoor herbs, and how to take action to control it for a healthy herb garden.
Why Humidity Matters
- Transpiration: This is the process by which water is lost from plants. The humidity level affects how quickly this water loss occurs.
- Nutrient Uptake: Proper humidity helps in efficient nutrient uptake, as it balances water pressure inside and outside the plant cells.
- Pest Resistance: Some pests are more likely to infest plants that are stressed due to inappropriate humidity levels.
- Leaf Health: Too low or high humidity can cause leaves to dry out or become moldy, respectively.
What Affects Indoor Humidity?
- Climate: Your local weather conditions can influence indoor humidity, especially if you often keep windows open.
- Season: Winter heating and summer air conditioning can drastically alter indoor humidity levels.
- Household Activities: Cooking, showering, and even breathing can influence indoor humidity.
How to Measure Humidity
- Hygrometer: This device can accurately measure the humidity level in your home. They are relatively inexpensive and easy to find.
- Observation: Signs like condensation on windows, dry skin or throat, and how quickly soil dries out can give you clues about humidity.
Strategies to Control Humidity
- Humidifiers: These devices can add moisture to the air, which is useful during the dry winter months.
- Dehumidifiers: Useful in humid climates, these can help prevent mold and mildew.
- Water Trays: Placing a tray filled with water and pebbles under your herb pots can add localized humidity.
- Misting: A light mist can add moisture to leaves, but be cautious not to overdo it, as this can lead to mold.
- Ventilation: Proper air circulation can help distribute moisture evenly.
Herb-Specific Humidity Needs
- Mint and Basil: These herbs generally prefer higher humidity levels.
- Rosemary and Thyme: These Mediterranean herbs are accustomed to lower humidity and well-drained soil.
Common Mistakes to Avoid
- Over-misting: This can lead to mold and fungal diseases.
- Ignoring Signs: Brown leaf tips may indicate too low humidity, while mold or soft growth may mean too high humidity.
- One-Size-Fits-All: Different herbs have different humidity needs. What works for one person may not work for another.
Takeaways
- Humidity is a critical yet often overlooked factor in the health of your indoor herb garden. From aiding in transpiration to influencing nutrient uptake, the right humidity level can make all the difference.
- You can control humidity through various means like humidifiers, dehumidifiers, and natural methods like water trays or misting. Remember, what’s right for one herb might not suit another, so adjust as needed.
- Always keep an eye out for signs of improper humidity levels, such as leaf discoloration or mold, and act accordingly to rectify the issue.
By taking time to understand and manage the humidity levels in your indoor herb garden, you can significantly improve the health and yield of your herbs.
15. Be Patient: The Virtue of Time in Cultivating an Indoor Herb Gardening
Like many other great activities, gardening involves a combination of expertise, work, and a healthy dose of patience. This is especially true when growing herbs indoors, where factors like sunlight, humidity, and temperature can have a big impact on the development and well-being of your plants. This article explains why patience is essential for growing herbs indoors, how impatience can result in common mistakes, and some techniques for developing patience in both yourself and your garden.
The Importance of Patience
- Germination Time: Different herbs have varying germination periods. Some may sprout within a week, while others might take several weeks.
- Growth Rates: Herbs don’t grow at the same rate. While some, like basil and mint, might fill out quickly, others, like rosemary or lavender, are notoriously slow growers.
- Adaptation: Herbs may need time to adjust to their new environment, especially if they’ve been transplanted.
- Seasonal Changes: Many herbs have natural cycles and might appear to “stall” in growth at certain times of the year, even if they’re indoors.
The Dangers of Impatience
- Overwatering: This is one of the most common mistakes made out of impatience and can lead to root rot.
- Over-fertilizing: Thinking that more nutrients will speed up growth can actually lead to nutrient imbalances.
- Constant Repotting: Giving the plants “more room to grow” before they need it can disturb delicate root systems.
- Frequent Pruning: Cutting too many leaves in the hopes that it will spur growth can actually weaken the plant.
Strategies for Cultivating Patience
- Set Realistic Expectations: Knowing the average growth and germination rates for your chosen herbs can save you from undue stress.
- Keep a Gardening Journal: Documenting your gardening journey can give you a sense of progress and a record to look back on.
- Stay Informed: The more you know about the particular needs and growth cycles of your herbs, the easier it is to be patient with them.
- Celebrate Small Wins: Every new leaf or successful propagation is a step forward. Celebrate these moments rather than fixate on end goals.
- Mindfulness and Presence: Sometimes simply spending time with your plants, observing their nuances without the urge to ‘do’ something, can be a form of active patience.
How to Wait Wisely
- Regular Checks: While it’s important to be patient, that doesn’t mean ignoring your plants. Regular but non-intrusive checks are vital.
- Seek Advice: If you’re concerned about the lack of progress, don’t hesitate to consult more experienced gardeners or turn to reputable resources.
- Adjust as Needed: Being patient doesn’t mean being static. If you see clear signs that something is off, such as yellowing leaves or pests, take appropriate action.
Takeaways
- Patience is not merely a virtue in the abstract; it’s a practical necessity for anyone hoping to succeed in the nuanced art of indoor herb gardening.
- A lack of patience can lead to common mistakes that can endanger the health and longevity of your herb garden.
- Cultivating patience involves setting realistic expectations, educating yourself, and making wise decisions even as you wait for your garden to flourish.
Remember, good things take time. Gardening is a journey for both the plant and the gardener. By practicing patience, you’re not just growing herbs; you’re also cultivating a more mindful and attentive approach to life.
External Link
For further information, please visit Wikipedia.
Conclusion
We hope you’ve enjoyed our in-depth guide on “15 Indoor Herb Gardening Tips.” Your journey to cultivating a thriving indoor herb garden starts with the right information, and we’re thrilled to have been a part of that. Thank you for taking the time to read through our tips! If you found this guide helpful, we have many more insightful articles to help you excel in your gardening endeavors. We invite you to explore our other posts for more valuable insights.
Feel free to share this article with friends, family, or anyone you think would benefit from these gardening tips. If you’ve already started your herb garden or used some of our advice, we’d love to hear about your experience. Please leave a comment and share your thoughts.
Happy Gardening!